If you’re shopping for a mixer and feeling a bit overwhelmed by all of the options, you’re going to find this video very helpful.
I want to introduce you to some important terms, show you the various types of mixers, and walk you through the three most important factors to consider when choosing mixer.
All of that’s coming up, but if this is our first time meeting, my name is Kyle. Welcome to Audio University!
Which Type Of Mixer Do You Need?
First, let’s take a look at a few different types of mixers. This will give you a general idea of which mixer you need, based on how you plan to use it.
Analog Mixers
The most common type is an analog mixer.
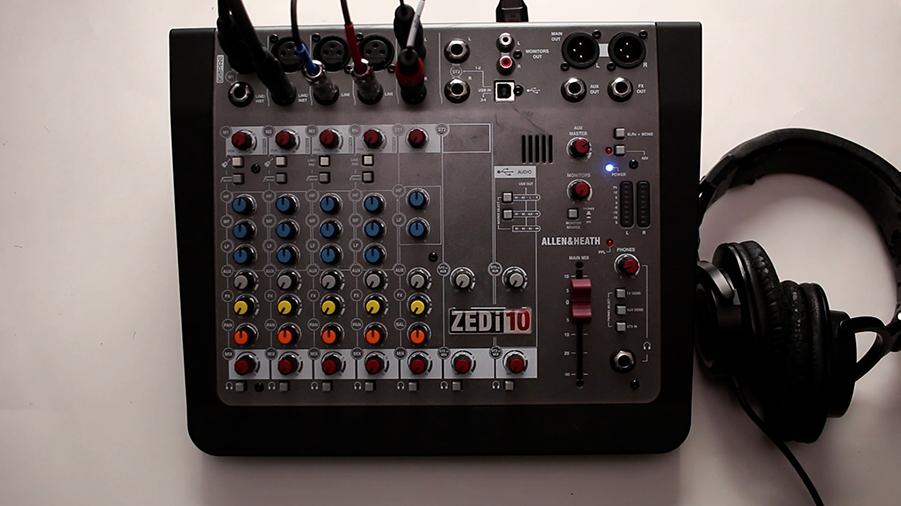
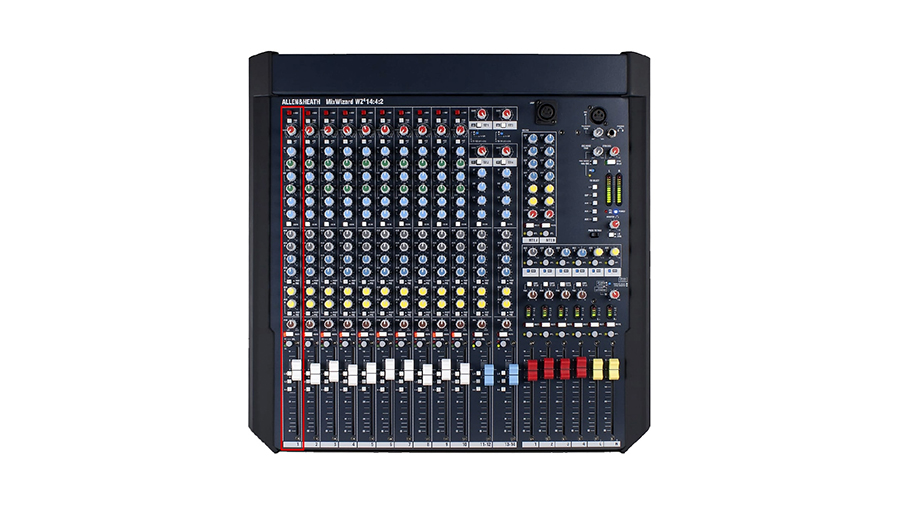
Analog mixers come in a vast range of sizes and costs. If you just need a simple mixer that will allow you to route a few signals between a few devices, something small like the Allen & Heath ZEDi-10 might be a good fit. In fact, I posted a video all about the ZEDi-10 a few weeks ago. I think it’s one of the best deals in it’s price range!
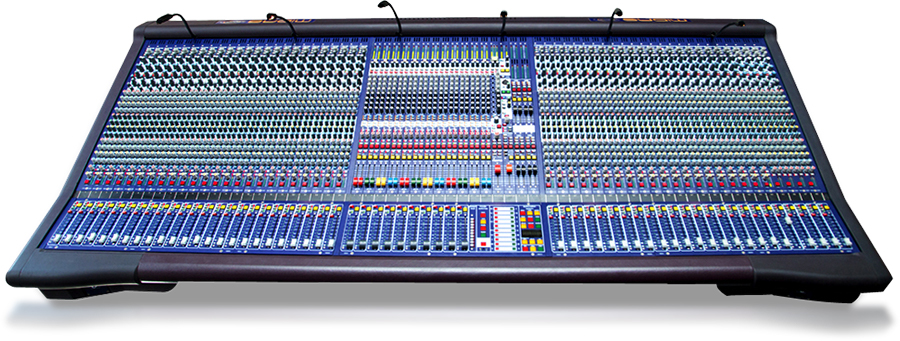
On the other hand, if you need to mix a full band with effects and matrix’ed outputs, you’re going to need something a lot bigger. Analog consoles like the Midas Heritage 3000 and the SSL Duality offer dozens of inputs, outputs, auxes, and other routing options.
As you can imagine, there are endless options between these two extremes…
One great thing about an analog mixer is that once you learn how to use one of them, you’ll probably feel comfortable operating just about any other analog mixer.
One drawback, however, is that the more inputs, outputs, and routing options you need, the bigger and heavier the console will be. Plus, you’ll usually need racks of outboard equipment if you’ll be using your mixer for live sound production.
Digital Mixers
That brings us to one of the main benefits of a digital mixing console. With digital mixers, you can fit a lot of functionality and power into a very small area, because you don’t need analog circuits for every channel.
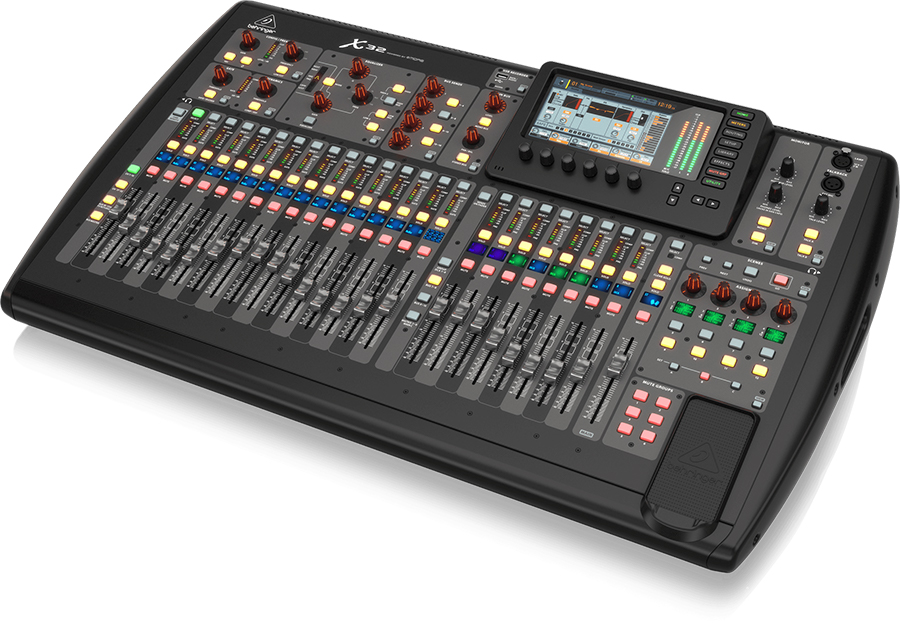
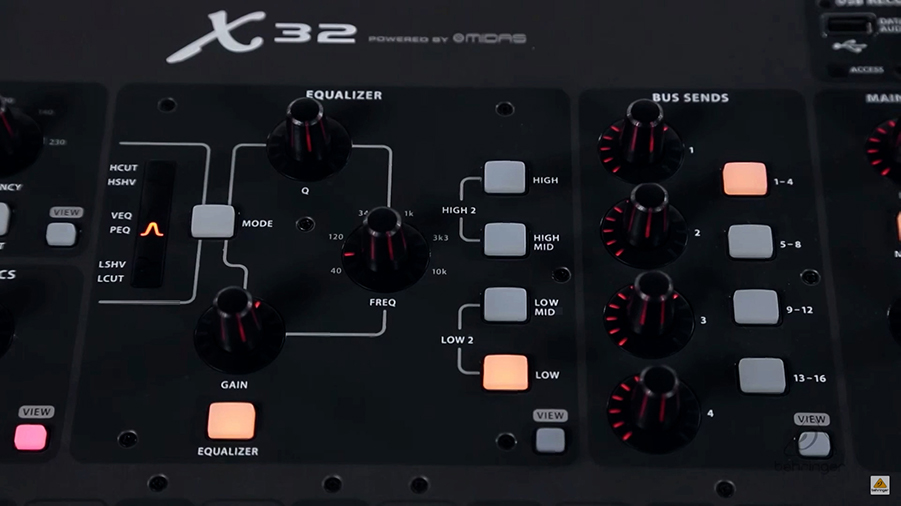
Take for example the Behringer X32. It can facilitate up to 40 channels and 16 mix buses! This mixer is one of the best and most popular options for churches, clubs and touring bands. You get A LOT of power for the money!
To get that same functionality out of analog gear would require a much larger and more expensive console, not to mention a full rack of outboard gear, which brings me to another big benefit of digital consoles. Most digital mixers have effects like EQ, compression, reverb, and delay built-in.
Not only that, but you can pre-program a digital console’s settings and recall different presets for each event. That makes them an excellent choice for tours, churches, and clubs.
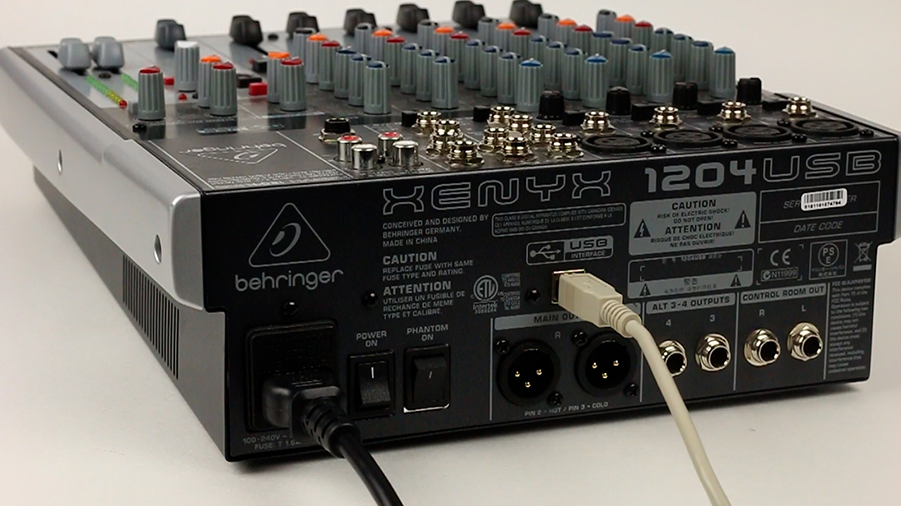
USB Mixers
The third type of mixer I want to talk about is actually more of a feature that can be found on a variety of mixers. That’s a built-in audio interface with USB connectivity. Many analog and digital mixers offer the ability to connect to a computer for multi-track recording.
For example, the ZEDi-10 that I mentioned earlier can facilitate 4-track recording directly into your recording software. The Behringer X32 that I have also mentioned can facilitate 32-track recording!
While there are other methods for recording that I’ll point out later, this method is by far the simplest and usually the most economical.
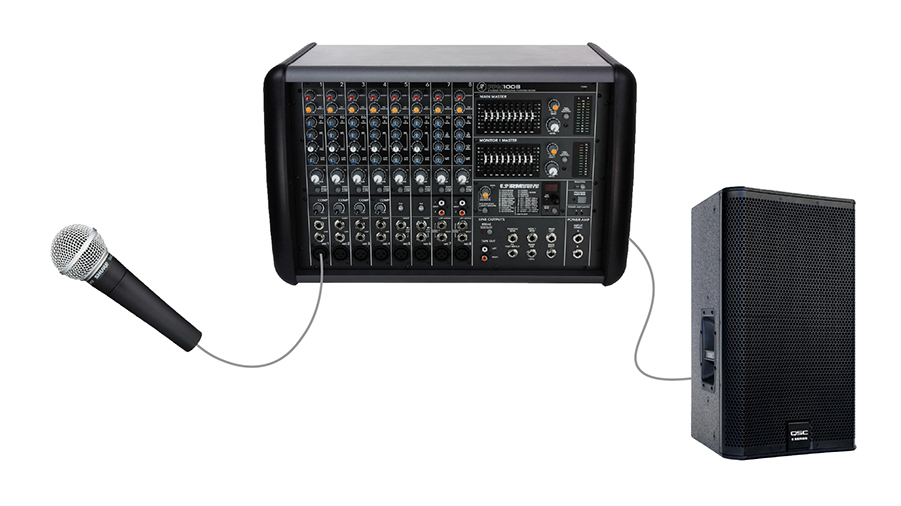
Powered Mixers
A powered mixer is a mixer that has a built-in amplifier for powering speakers, which makes them a great choice for rehearsal spaces or portable PA systems.
While the features of a powered mixer are relatively limited, the portability and simplicity might make them an ideal choice for some users. You simply plug the mixer into the wall for power and then connect the microphones and speakers directly to the mixer with no need for external amplifiers.
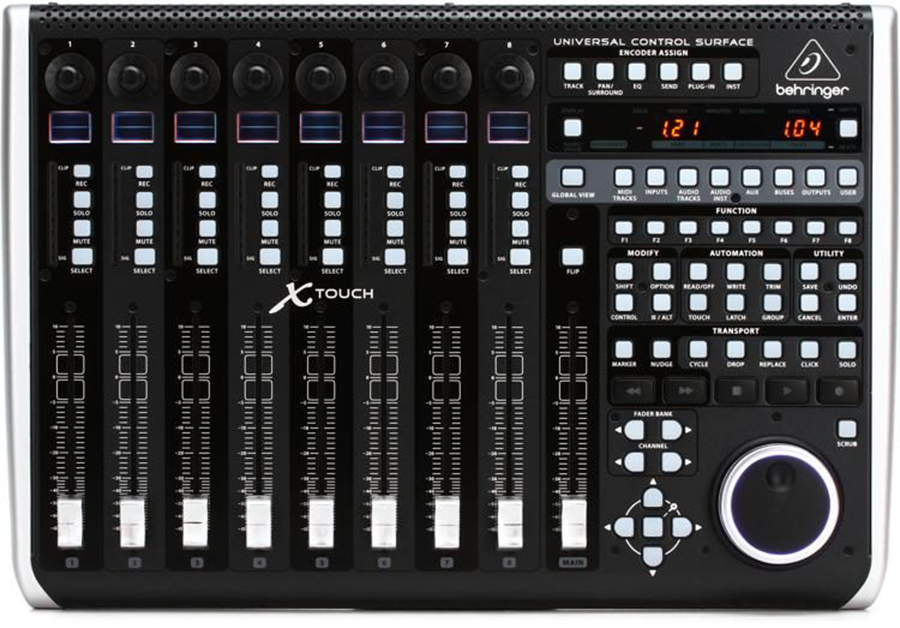
Control Surfaces
While a control surface might look like a mixer, it doesn’t actually provide any signal processing or routing capabilities.
Control surfaces are simply tools that provide mixer-like control of a DAW or recording software. Some digital mixers can be used as control surfaces, but not all of them and it’s important to keep this distinction in mind.
3 Key Factors When Choosing A Mixer
Now that you’ve seen an overview of the types of mixers that are available, let’s get into some key factors to consider when shopping.
Before we do, I want to let you know that links to all of the mixers mentioned in this post are mixers that I’ve used and recommend. If you buy through these links, a portion of your purchase will go toward Audio University at no extra cost to you. It’s just a way for me to support these helpful posts for you and other subscribers.
#1 – Inputs & Outputs
The first thing you’ll want to decide is how many inputs and outputs you’ll need. This is probably the most important factor and will give you a rough idea of how much you can expect to spend.
Inputs
Make sure to consider the various types of inputs that are available.
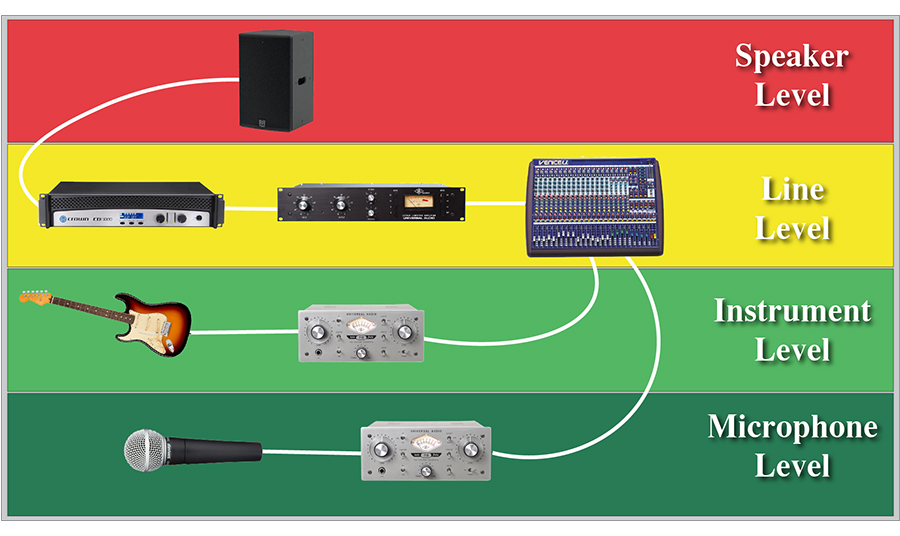
For example, in order to connect a microphone to the mixer, you’ll need a mic level input. You can’t just connect a mic directly into a line level input. Learn more about the difference by watching this video on mic level versus line level.
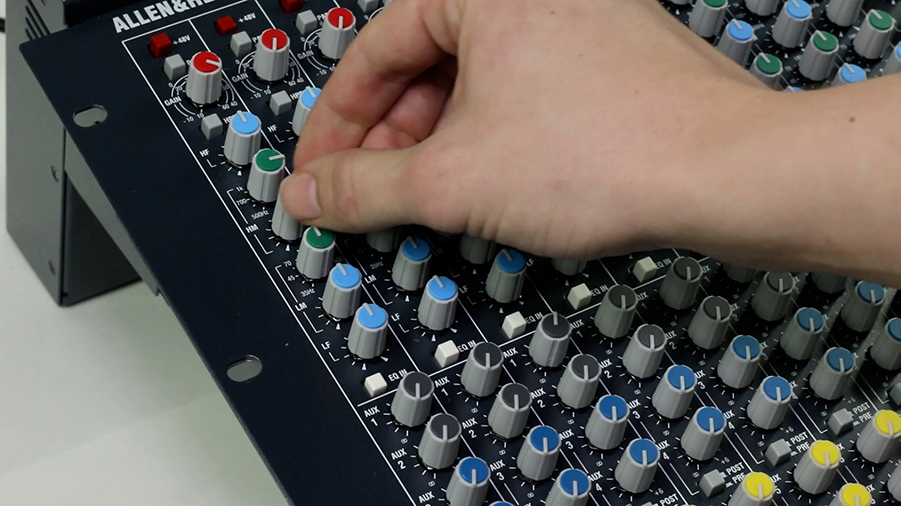
The main difference between a mic level and line level input is the preamp. Make sure you pick a mixer that has a microphone preamp for every microphone that you wish to connect.
Outputs
In most situations you’ll want to route audio to at least one pair of outputs that will be connected to your main left and right speakers. However, in many situations you’ll need some additional outputs.
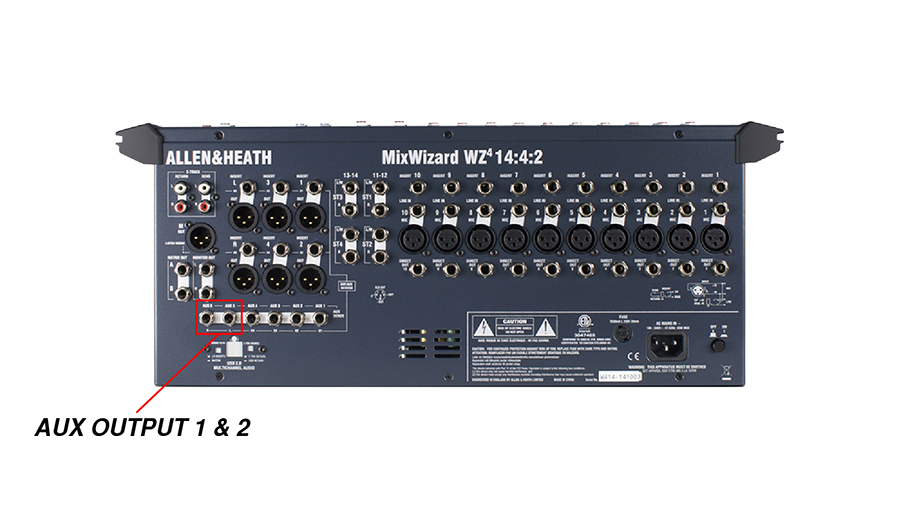
For example, perhaps you will connect the main outputs to the main speakers but in addition to the main speakers, you might also want to route signals to some stage monitors so that the performers can hear themselves. In this case, you’ll want a mixer that has some additional auxiliary outputs that can be connected to those stage monitors.
If you plan to use any outboard effects processors, you’ll need to get a mixer with either inserts for EQs, gates, and compressors or effect sends for outboard reverbs and delays.
Unless you’ve got a collection of outboard gear already, I’d personally recommend starting with a digital console that has these effects already built-in. It will save you money, space, and setup time.

Multitrack Recording
As I mentioned before, some mixers have built-in USB interfaces that route audio into a computer to be recorded or streamed. This is by far the most streamlined way to make multitrack recordings, where each input is recorded to a separate track in your recording software.
If you’re using a mixer that doesn’t have USB connectivity, you can still record, you’ll just need a separate audio interface.
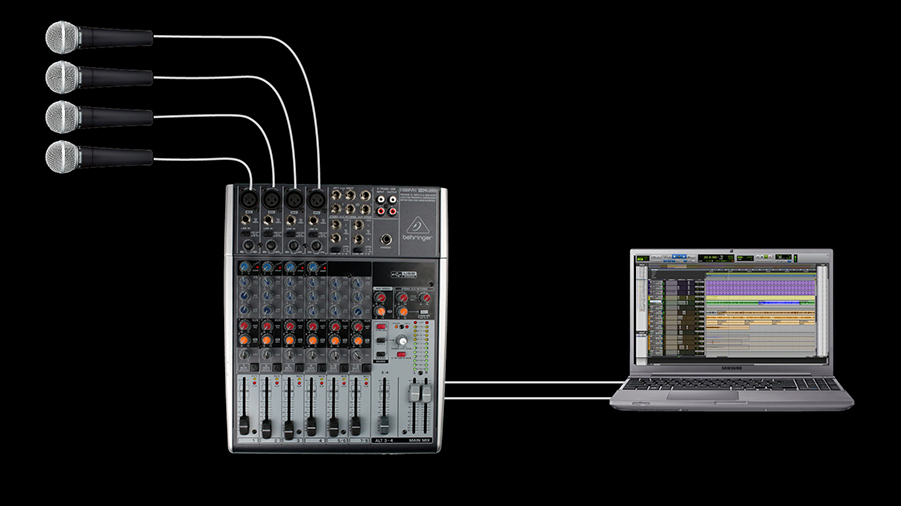
You could mix all the inputs together in the mixer and send the mix down into your audio interface. Just remember that you won’t be able to individually control the inputs after recording with this method.
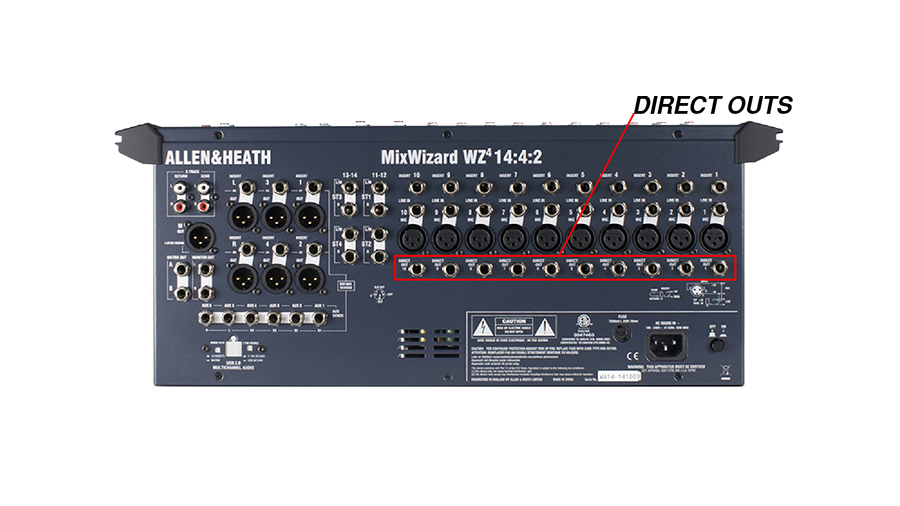
Alternatively, you could connect the direct outputs of each channel to your interface. To keep all the inputs on separate tracks, this method would, of course, require an interface with several inputs.
For more information on how to connect a mixer to an audio interface, check out the Audio University post about using mixers in a home studio.
Digital I/O
In addition to the analog and usb inputs and outputs we’ve covered at this point, some mixers offer digital inputs and outputs. The most common digital protocols you’ll find are Dante, AES3, MADI and AVB.
These protocols make it possible to send anywhere from a few dozen to hundreds of channels over a single cable which can be extremely advantageous in live sound and in large integrated systems!
#2 – Onboard Effects & Processing
The second thing you’ll want to consider is the type of effects and processing built into the mixer.
If you do most of you’re mixing in a DAW, you probably won’t need many effects on your mixer. The DAW will provide you with all the processing tools you’ll need. If you’re working in live production, you’ll want a mixer that has effects built-in.
You might be tempted to try and run signals through a computer in real time, but this will almost certainly cause too much latency, or delay. For live performances, it’s best to use the EQ, dynamics, delays, and reverbs that are running on the mixer, itself.
That’s why digital mixers are almost always the best choice for live sound applications, compared to analog. Even affordable digital mixers like the Behringer X32 come with the basic tools you’ll need for mixing a live band.
Honestly, it’s incredible how powerful these consoles have become! Professional mixers like the DiGiCo SD9 offer incredible processing power and routing options.
In any case, make sure to choose a mixer that will at least provide the essential tools like EQ, compression, and gates. Most analog mixers do have basic EQs, but they usually don’t really cut it for live mixing and feedback suppression.
I created a full post on eliminating feedback. It will walk you step-by-step through a process to eliminate microphone feedback before it happens. If you work in live sound production, I’d highly recommend using this process!
#3 – Control
The third factor to consider is the set of control features. Some mixers are more basic and others offer complete customizability.
Analog vs Digital Mixers
As I mentioned before, analog mixers are all, more or less, the same. Each input channel has a channel strip and each bus has a master knob or fader.
Check out the Audio Mixing Console User Guide for the basics of using any analog mixer. Once you learn how to use one of them, you’ll have a good understanding of how to use all of them.
However, digital consoles come in a much wider variety. You may find that you need to dig through a couple of screens in order to find what you’re looking for with a digital console. And while this might seem like a limiting factor, it also means that you can control a lot more on a much smaller interface.
In my opinion, digital consoles with motorized faders are almost always the best option. Instead of reaching across a giant console, you can simply flip to a set of faders you want and control and adjust them right there in front of you.

Groups & DCAs
You should also keep an eye out for features such as group faders or DCAs, which let you control many channels with a single fader.
These features allow you to set up a drum mix consisting of several microphones and then control the overall level of those elements with a single fader. You could also use a group to add reverb or compression to all of the elements equally.
Automation (Scenes, Presets, etc.)
While some high-end analog consoles have automation options, almost every digital mixer allows you to create presets and scenes.
Imagine dialing in a unique mix for each band during sound check and then simply recalling those mixes throughout the show. You can even do the same thing with a separate scene for each song if you find yourself working with the same band with the same setlist night after night.
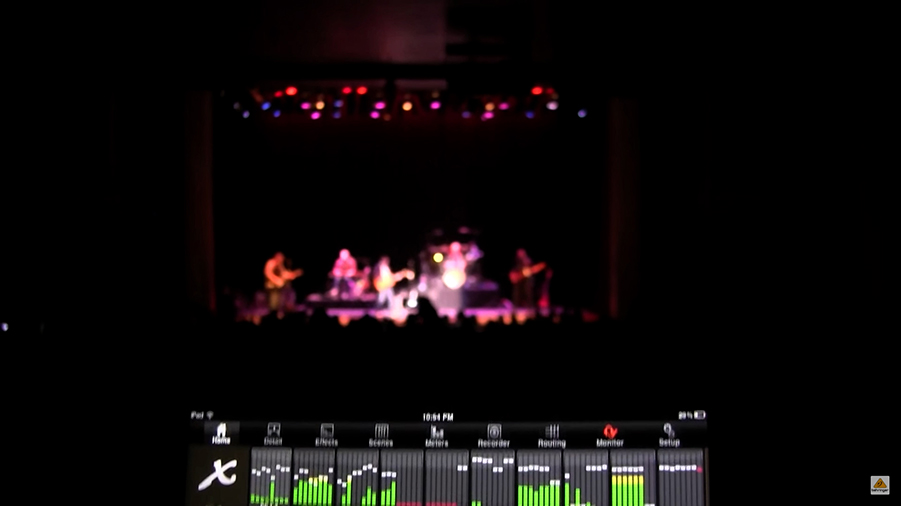
WiFi Remote Control
In an ideal world, your mixer will always be perfectly located in the center of the audience so that you can hear what the audience is hearing while you’re mixing. But in reality, your mixer might be tucked away behind the stage somewhere which makes it difficult to hear what you’re doing while you’re controlling the mixer.
This is where wireless control comes into play. Most digital mixers can be connected to Wi-Fi routers and controlled by a tablet remotely. So, while the mixer is beside the stage, you can be in the audience making adjustments to the faders and the effects while you’re in front of the speakers.
The Behringer X32 has this functionality and the app is very good. It gives you full control of the console, which is useful when you are working solo or want to walk around the venue to hear how it sounds in different areas.