In this post, you’ll learn how to use an audio mixer.
The same basic principles apply to using any mixing console. If you learn these basic principles, you’ll feel comfortable walking up to any analog audio mixer that you’ll encounter.
Audio Mixing Console Layout
Let’s first take a look at the different sections of this mixer. Dividing the mixer into sections, you’ll find that it isn’t nearly as complicated as it looks.
Inputs & Outputs (I/O)
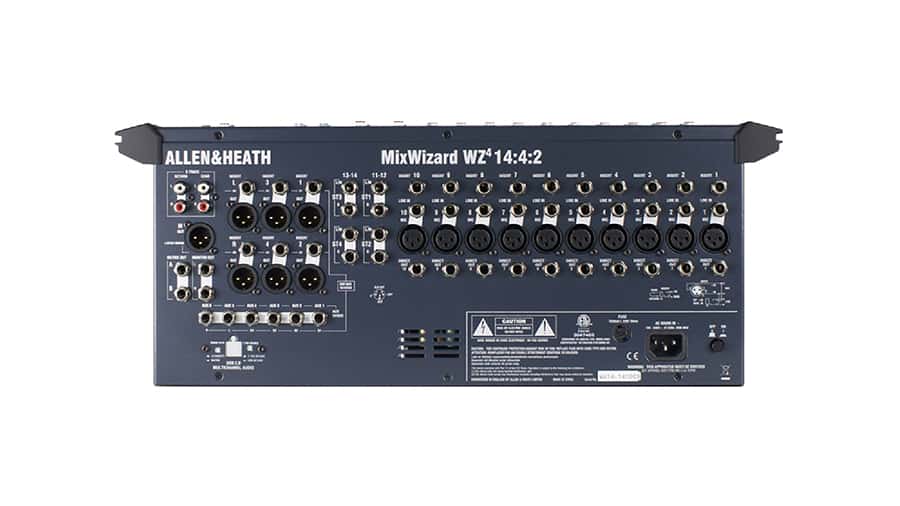
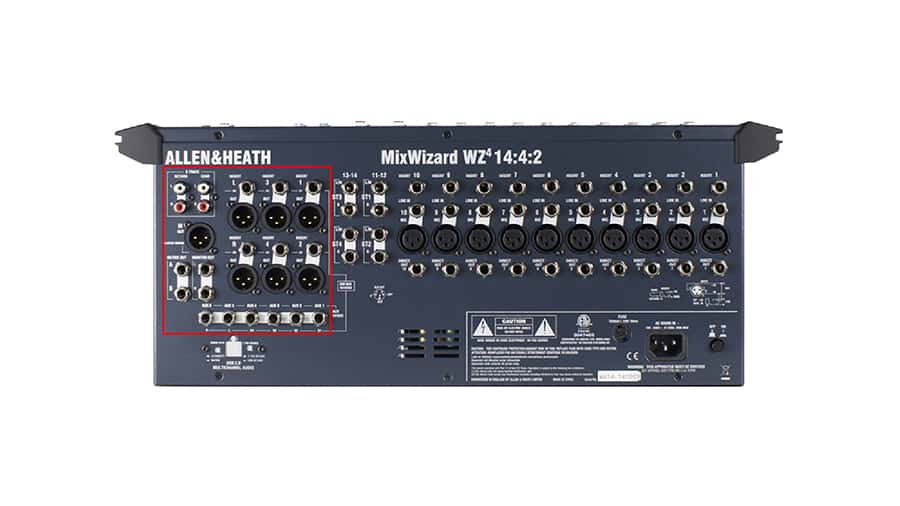
Either on the top or the rear panel of the console, you’ll find the inputs and outputs.
This is where you connect input devices (such as microphones) and output devices (such as speakers).
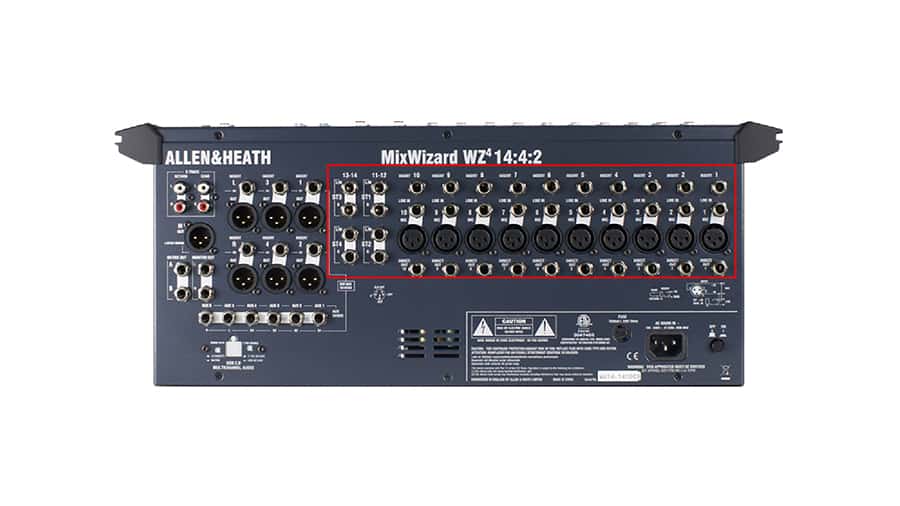
Channel Strips
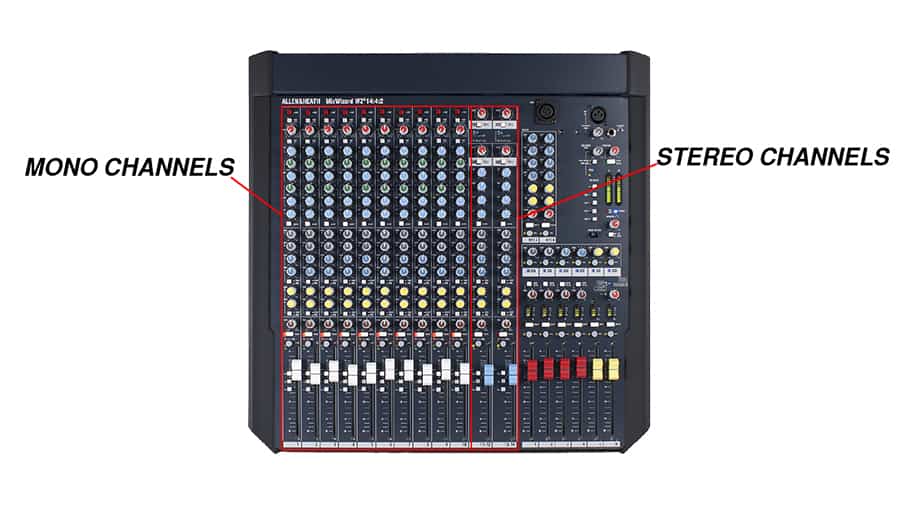
On the left portion of the console, you’ll see a bank of channel strips.
Each vertical column of knobs, buttons, and faders represents an individual input channel. That set of controls simply repeats itself again and again for each input.
You can see that this console has 10 mono mic/line level input channels and 2 stereo line level input channels.
Master Section
On the right part of the console, you’ll find the master sections. This gives us basic control over each of our outputs:
- Master Fader
- Group Faders
- Aux Master Knobs
- Matrix Master Knobs
Audio Mixing Console Inputs & Outputs
Let’s go through the basic types of audio inputs and outputs that you’ll find on a mixing console. This will include outputs, inputs, inserts, and direct outs.
Outputs
The first step in a basic setup will be to connect the main outputs to the speakers. To do this, I’ll connect the left and right outputs of the mixer to the inputs of the main amplifier.
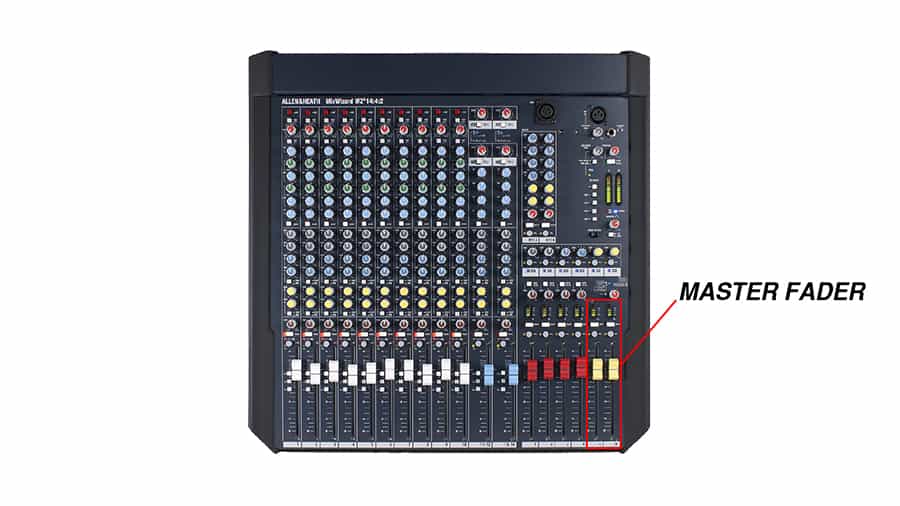
The level of these outputs is controlled by the master fader, usually found in the bottom right-hand corner of the mixer.
In this case, I’m also going to use these auxiliary outputs to send audio to some powered stage monitors so that the musicians can hear themselves better. I’ll use a TRS to XLR adapter and a long XLR cable that will connect directly to the powered stage monitor.
The level of each AUX output is controlled by the AUX master knob found in this section.
Inputs
Now that we have set up destinations, let’s plug in some audio sources so that we have audio signals we can route to those destinations.
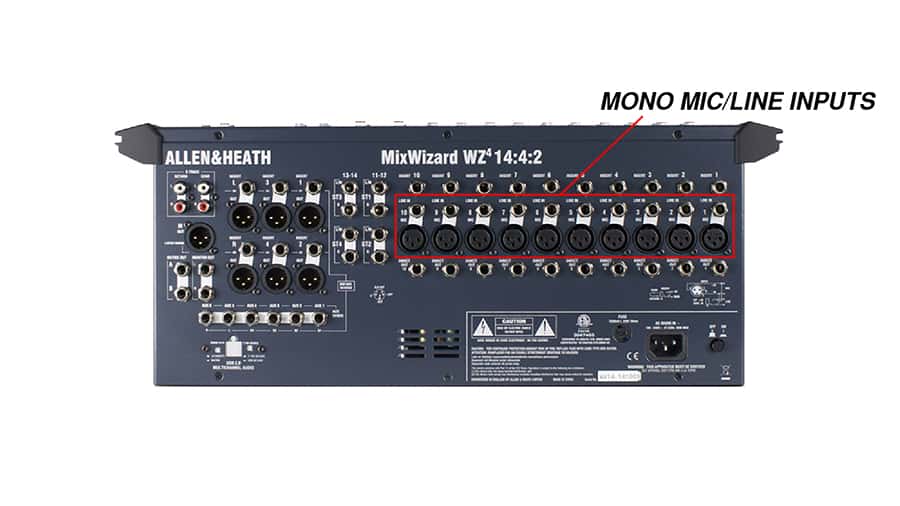
Mono Mic/Line Inputs
This mixer has 10 channels that can accept line level or microphone level signals.
I’ll plug a dynamic microphone for vocals into Channel 1 with an XLR cable, a condenser microphone for guitar into Channel 2, and a line level device (such as a drum sequencer) into Channel 3 using a ¼” TRS or TS cable.
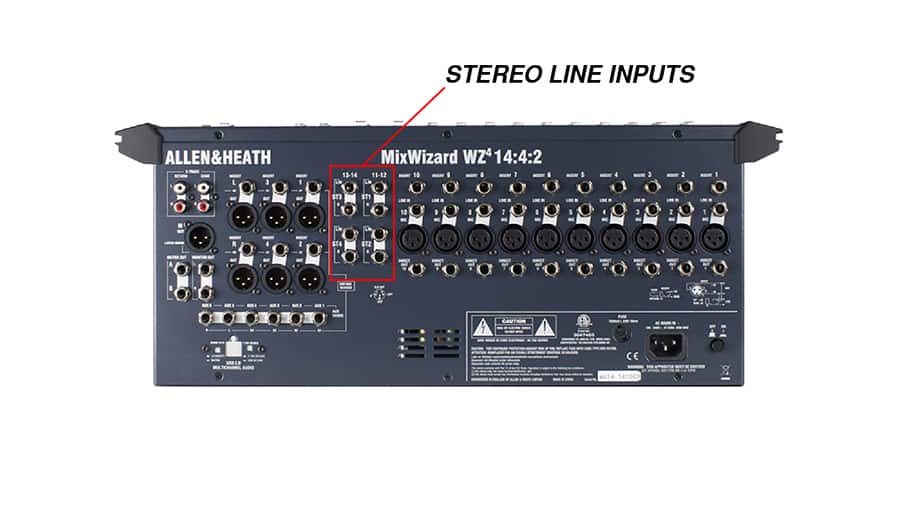
Stereo Line Inputs
If I want to apply the same processing to a pair of signals, such as the left and right channel of background music, I can use one of the four stereo line input channels.
I’ll connect my smartphone to one of these stereo channels with a 3.5mm to Dual ¼” TS adapter.
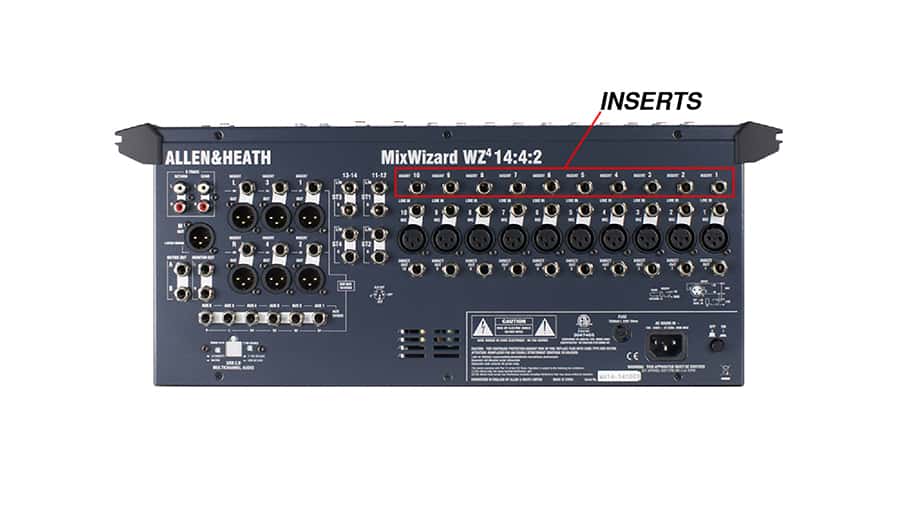
Inserts
Your mixer may have “Insert” jacks like this on some channels. An insert gives you a way to insert an outboard processor into a channel strip.
To use these connections, you will need a ¼” insert cable that sends audio out of one connector to an outboard device (such as a compressor). The other connector on the insert cable takes audio from the output of the compressor back into the channel strip on the mixer.
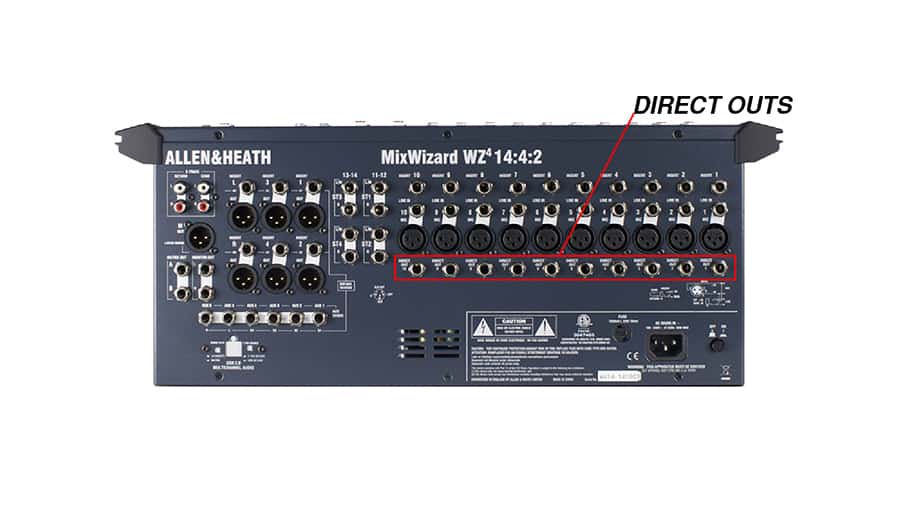
Direct Outs
The “Direct Outs” on each channel give you the chance to send a clean copy of each source out of the mixer.
The direct output signals will be unaffected by the processing on the channel strip, which is useful for sending each input source to a multitrack recording device. That way, the adjustments you make on the mixer won’t affect the recording.
Channel Strips
Let’s go through a channel strip from top to bottom to see what type of control we have over each individual signal.
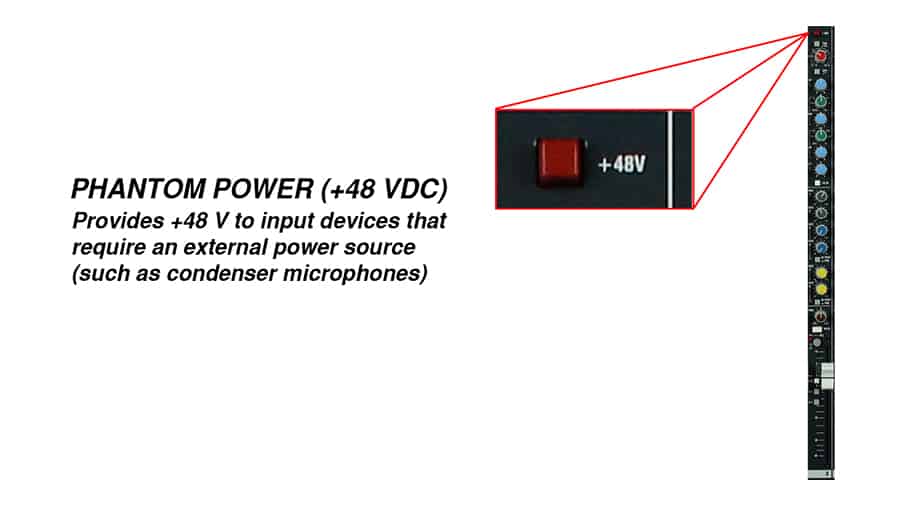
Phantom Power
At the top of each channel strip, you may see a phantom power switch. Some microphones (such as condenser mics) require external power to function.
The microphone I’ve plugged into Channel 1 is a dynamic microphone, which doesn’t require phantom power.
However, the microphone plugged into Channel 2 is a condenser microphone, so I’ll engage the phantom power switch on Channel 2.
On some consoles, there is a single switch that controls phantom power on all channels on the back of the mixer.
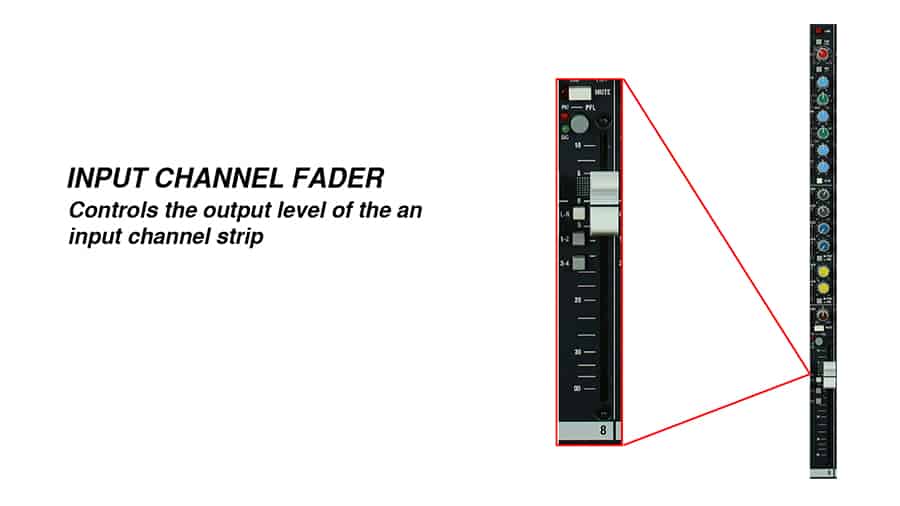
Fader
At the bottom of each channel strip, you’ll find a fader and some basic routing buttons.
I want the first three inputs to be routed to the main Left and Right outputs that feed the main speakers. To do that, I’ll engage the L-R button on the first three inputs.
Let’s double-check that the Master Fader is at unity, so that signals sent to the master fader are passed through to the main outputs. Remember, the Master Fader controls the output level of the main outputs.
Each channel strip has a fader, too. These faders determine the level of the signal sent to the master fader.
It’s best to start with faders at unity gain. When a fader is set to unity, it won’t boost or reduce the signal – it just lets the signal pass through.
The fader also operates on a logarithmic scale, which means that the same movement of the fader would be a small adjustment around the 0 dB mark and a much bigger adjustment the further you get from the 0 dB mark. Working around 0 dB gives you the finest control over the signal level.
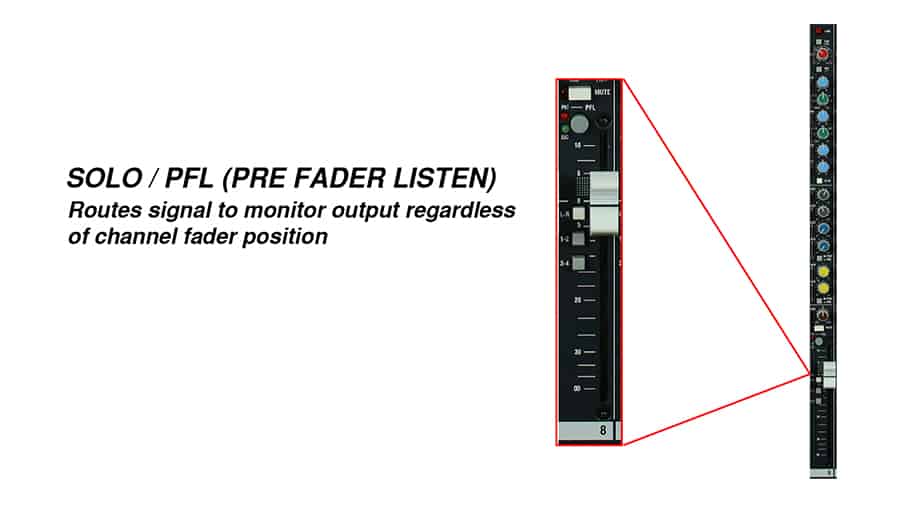
Solo / Pre-Fader (PFL)
If you don’t have speakers set up yet, you can use the “Solo” or “PFL” button.
PFL stands for Pre Fader Listen. This button will let you listen to the input channel through headphones, regardless of the position of the fader.
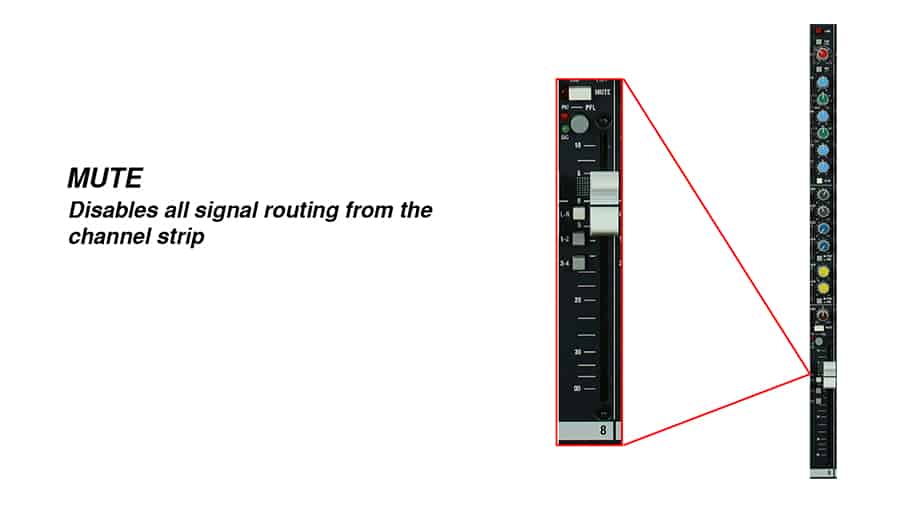
Mute
Finally, the mute button on each channel will mute the signal to the master fader, regardless of the fader position.
Preamp Gain
Once you’ve routed your input channels to the main speakers or to headphones, the preamp gain knob is the first setting you should adjust. This knob determines the input level of the audio source.
I recommend adjusting the preamp gain knob based on how loud you need the source to be in the mix, while keeping your faders set to unity.
As you adjust the knob, you should start to hear the signal through the speakers and see your meters jump. If the speakers are way too loud, consider turning down your amplifier, rather than adjusting the Master Fader.

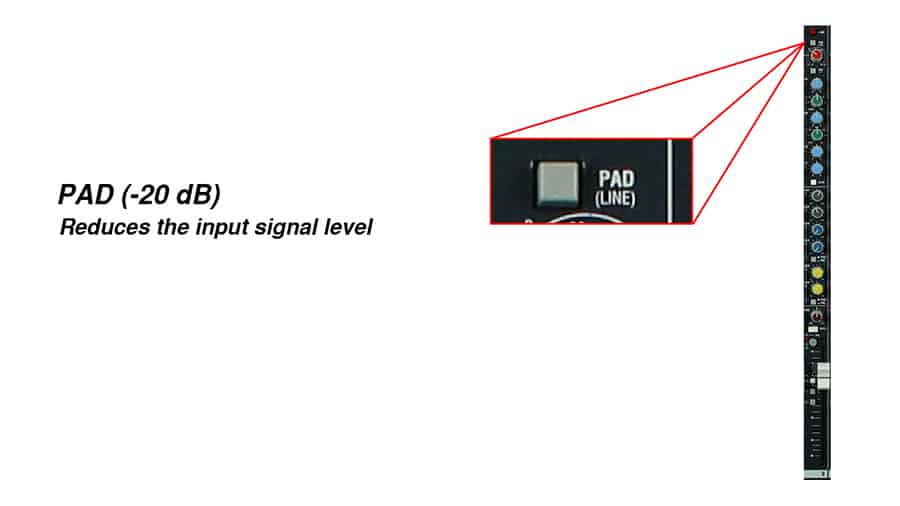
Pad (-20 dB)
The “Pad” switch allows you to attenuate the input level by -10 or -20 dB. This is useful when recording a very loud source such as a snare drum or a very sensitive microphone.
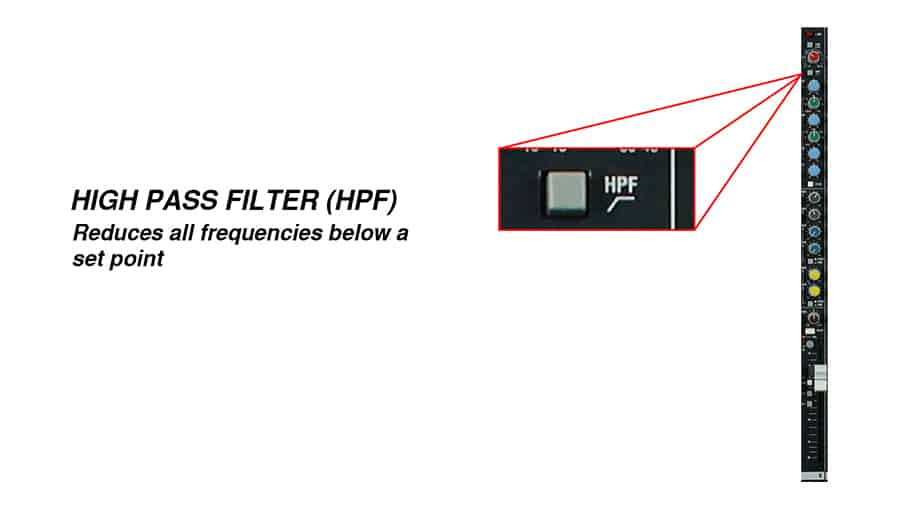
High Pass Filter (HPF)
This mixer has a High Pass Filter, marked with the letters HPF. A high pass filter will reduce all frequencies below a certain point.
To learn more about high pass filters, check out this post I wrote all about how high pass filters work and how to use them.
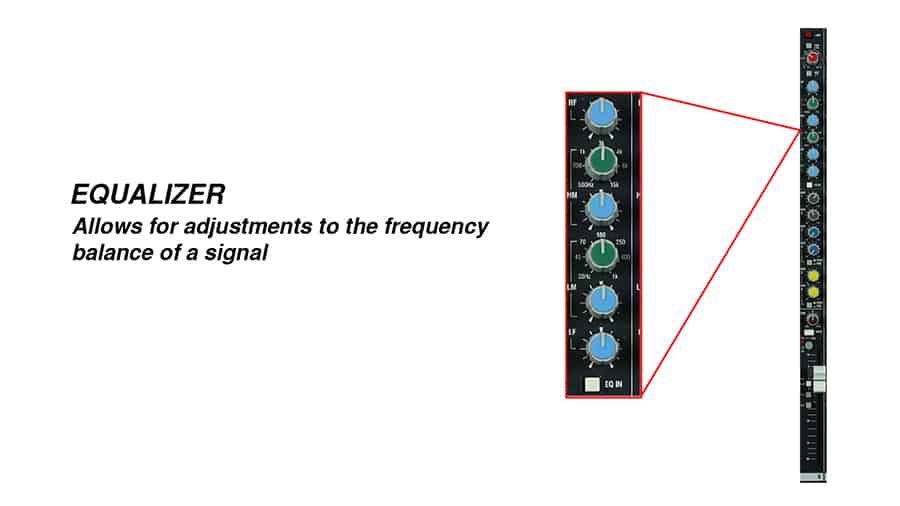
Equalizers
The equalizer section of this channel strip gives me 4 bands of EQ – High, High Mid, Low Mid, and Low.
First, I need to engage the equalizer section by pressing the “EQ IN” button.
The high and low bands are fixed to a specific frequency. Turning the knobs clockwise boosts that frequency band and turning them counter-clockwise reduces that frequency band.
The High-Mid and Low-Mid bands give me the ability to control the frequency band I want to boost or cut. I can choose the frequency bands I want to adjust with the green “Frequency” knob and determine how much to boost or cut those frequency bands with the blue “Gain” knobs.
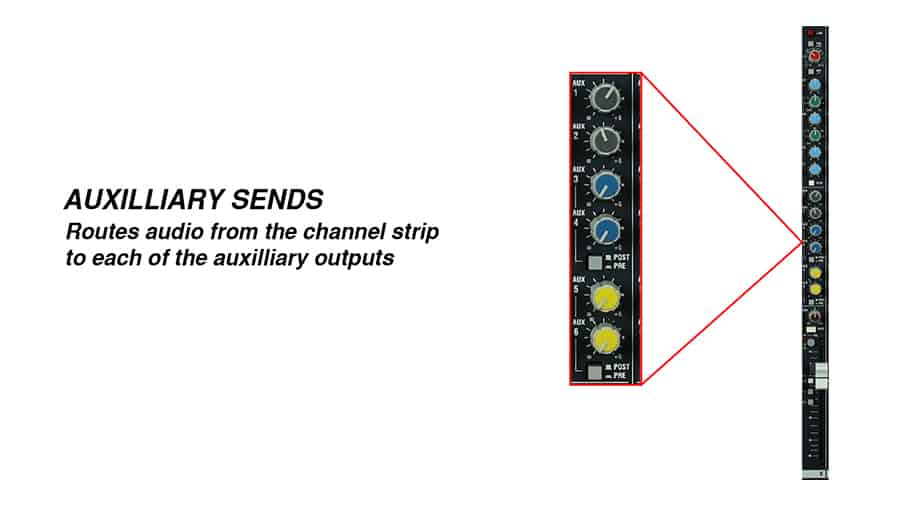
Aux Sends
In the first section of the video, I connected AUX Outputs 1 & 2 to powered stage monitors so that the musicians will be able to hear themselves. Using the AUX Sends on each input channel strip, I can send signals to those AUX outputs.
Let’s first double check that the AUX master knobs are set to unity.
The vocalist’s stage monitor is connected to AUX output 1. I’ll send the vocalist a bit of the vocal microphone and a bit of the guitar microphone.
The guitarist’s stage monitor is connected to AUX output 2. Let’s send the guitarist some signal from the vocal microphone.
The “Pre” and “Post” buttons determine if the signal will be affected by the channel faders. Pre means pre-fader, and post means post-fader.
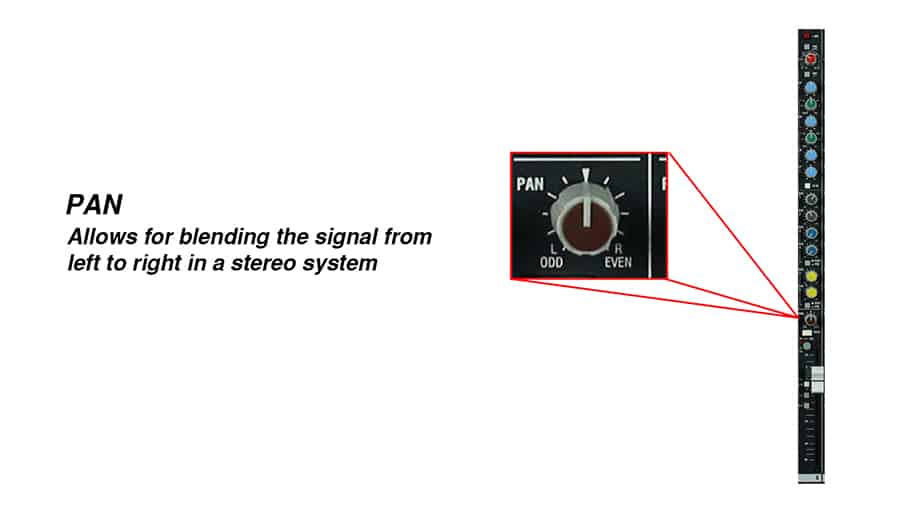
Pan Knob
If you have two main speakers – a left speaker and a right speaker – the pan knob lets you create a stereo image.
I wrote this post about how this works that you can watch by clicking this link.