By the end of this post, you’ll feel more prepared to use any audio mixer because the features and signal flow I’m about to show you are shared by almost every mixer in existence.
In this post, we focus on the knobs, buttons and faders found on an audio mixer channel strip. For the full mixer tutorial, check out this post: Audio Mixer Tutorial
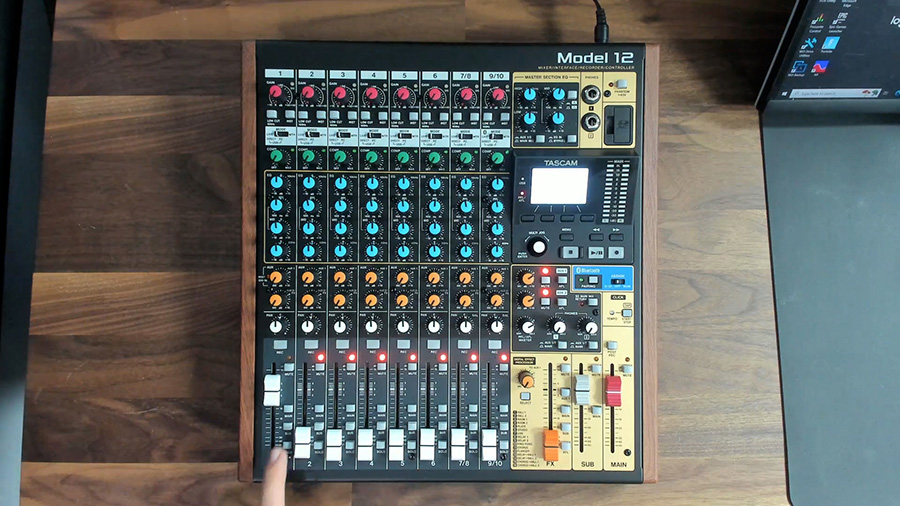
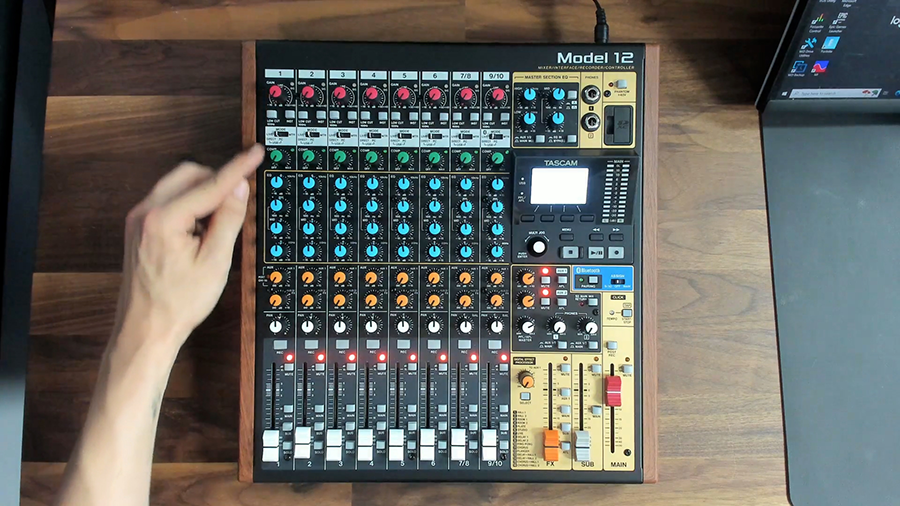
Audio Mixer Channel Strips
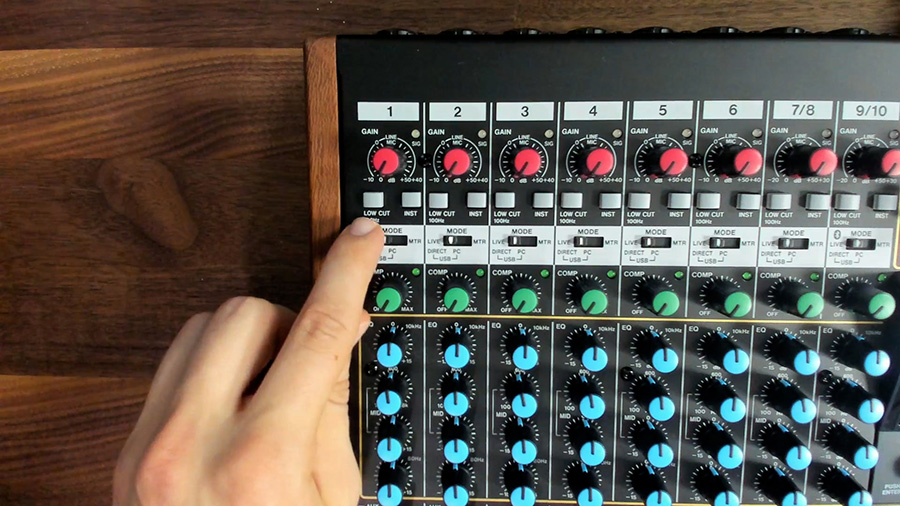
A mixer will typically have between 2 to 48 input channels, or even more than that. This particular mixer (TASCAM Model 12) has 10 mic/line inputs.
Each input passes through one of the channel strips on the mixing surface. Let’s dive deeper into one of these channel strips.
The signal flows from the top of the channel strip to the bottom…
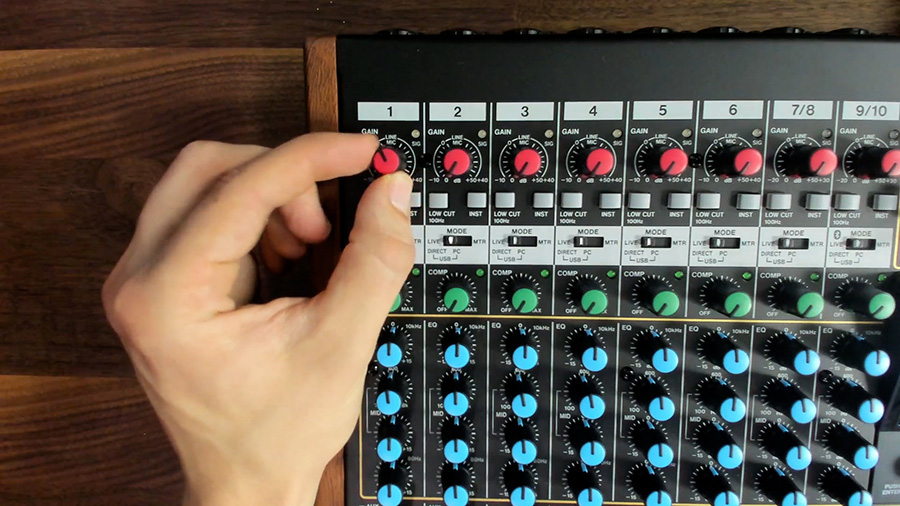
Preamp Gain
At the top, we will almost always see a preamp gain knob. The preamp gain knob allows us to amplify the signal from a microphone or another input source to line level.
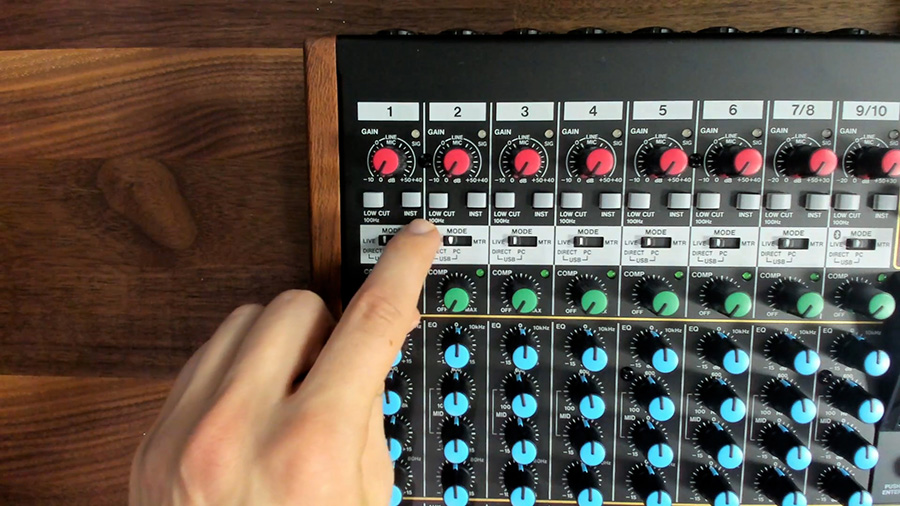
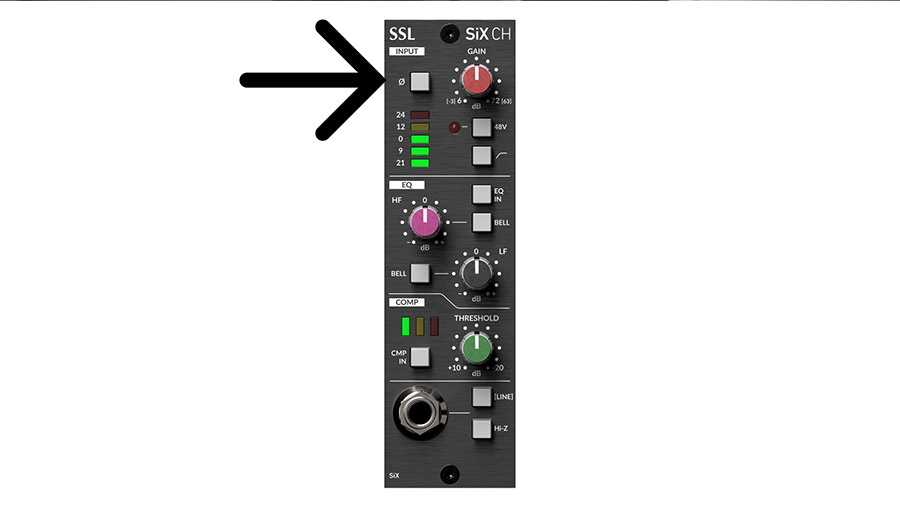
Line / Instrument Switch
You’ll often find a few buttons at the top of the channel strip. This mixer has an instrument button, which switches the input impedance. By default, the inputs are set for low impedance line or microphone inputs. Engaging the instrument button would allow you to connect an electric bass or guitar.
Low Cut (HPF) Switch
There is also a Low Cut button, sometimes labeled HPF for High Pass Filter. This button engages a filter that reduces frequencies below the cutoff frequency, which is 100 Hz in this case. That can be helpful for removing the unnecessary low frequency energy on inputs like vocals that usually only go down to about 100 Hz anyway.
Polarity Switch
Some mixers will also have a button that reverses the polarity of the signal. This would invert the audio wave by turning the positives into negatives and the negatives into positives.
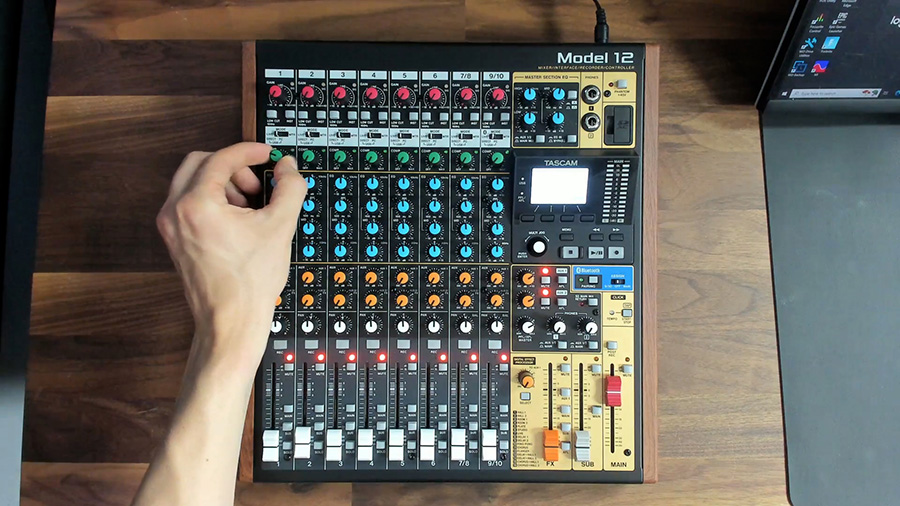
Dynamics (Compressor, Gate, etc.)
As we move down to this green knob, we find a compressor. This is a very basic compressor with only one knob but you’ll sometimes find more advanced compressors on other consoles.
A compressor is useful when you want to reduce the difference between the loud and quiet parts of a signal. If the quiet parts are too quiet and the loud parts are too loud, use the compressor to turn down the loud parts and bring everything up together.
Compressors fall within the category of dynamics processing because they affect the dynamic range of a signal. You might also find additional dynamics processors like a gate on your channel strip, which would actively reduce the signal when the signal level drops below a certain point.
Equalizer
The EQ, or equalizer section allows for shaping the frequency balance of the sound.
This EQ has 3 bands: High, Mid, and Low. The high section is a high shelf, the low section is a low shelf, and the mid section is a bell curve with a variable frequency knob.
The gain knob for each band is currently set to the center (or 0 dB), which means the EQ filter isn’t doing anything. But you can turn the frequencies in each band up or down by adjusting the gain knob.
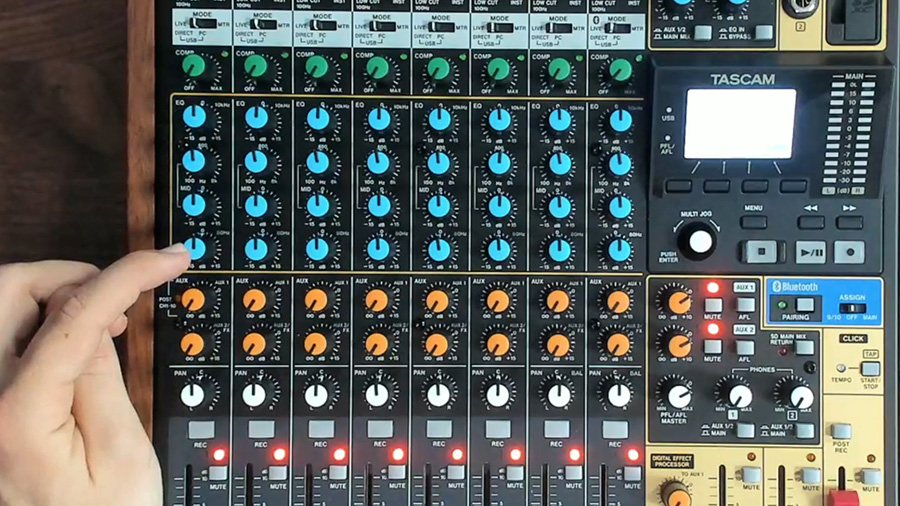
Aux Sends
After the EQ section, we come to the auxiliary sends. The Aux Sends offer a way to send the signal from this channel to the Aux Outputs found on the back of the mixer.
Auxes can be useful for creating mixes for speakers on stage, for creating a separate mix for a recording or stream, or anything else you can imagine.

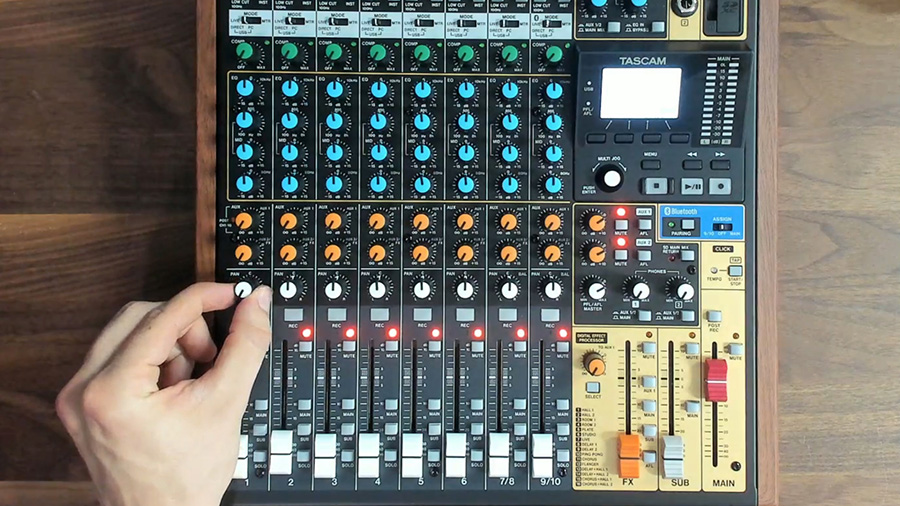
Pan
The pan knob is set to center by default, but adjusting it to the left or right will send more or less to the left speaker or right speaker.
This can be used to create space and dimension in the mix by placing the different instruments in a specific spot between the two speakers.
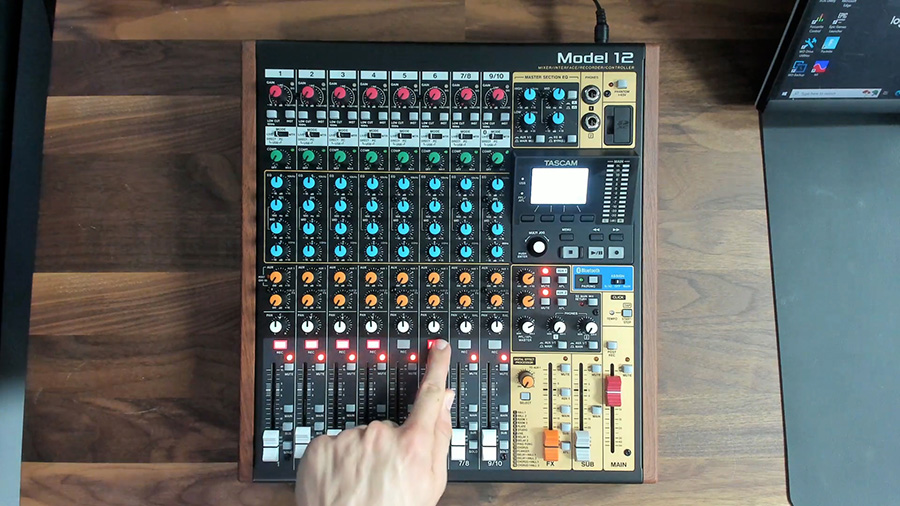
Record Arm
This particular mixer is called the TASCAM Model 12. It’s an all-in-one mixer, interface, and portable recorder.
This record button engages the record arm for the channel. When it’s engaged, the channel will be recorded.
This isn’t a typical function of a mixer, but it IS one of my favorite features of the TASCAM Model 12.
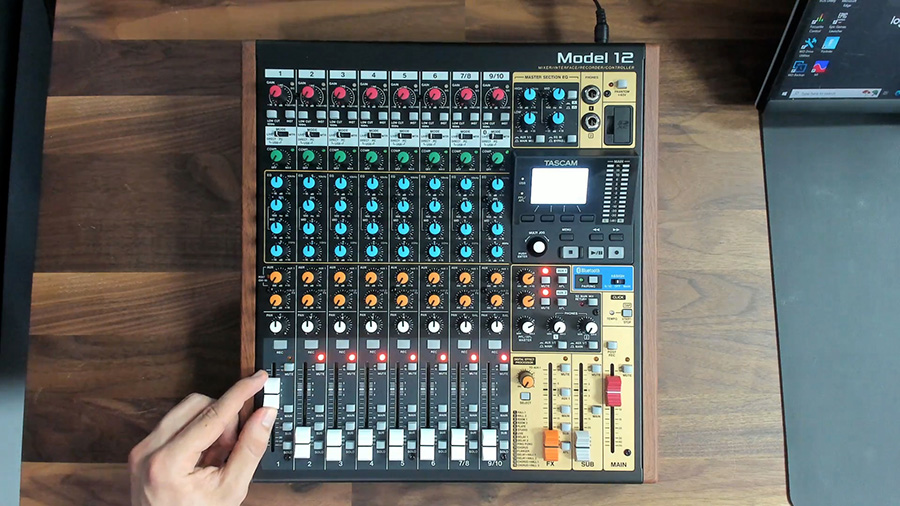
Mute & Level Fader
Next, we find the mute button and fader, which control the level of this channel in the main mix.
Setting the fader to 0 dB, or unity gain, will allow the signal to pass without boosting or cutting the level.
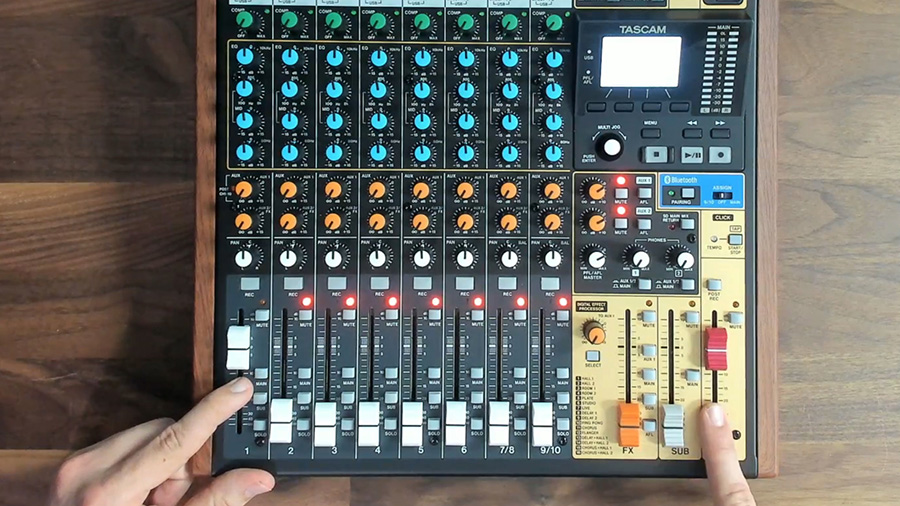
Routing & Group Switches
On many consoles, there will be routing buttons like these that send the channel to groups or different outputs.
Pressing the Main button sends this channel to the Main fader. Pressing the Sub button sends this channel to the Sub fader. The Main fader signal comes out of the main outputs on the back, while the Sub fader signal comes out of the sub outputs.
Solo
The solo button at the bottom of the channel strip will spotlight only this channel in the headphones. That way, you can make adjustments without the distraction of hearing the other channels.