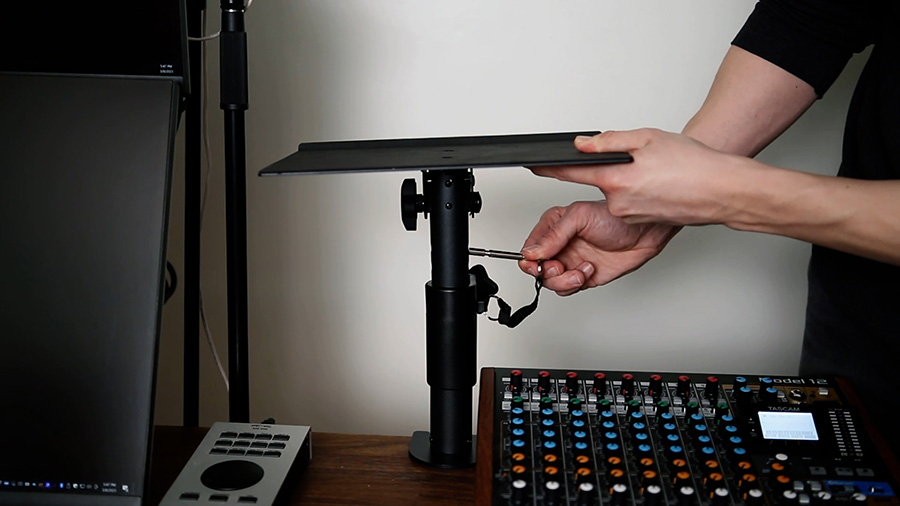
Do studio monitor stands really have an effect on sound quality? In the video above, I’ll set up a binaural microphone so that you can hear the difference for yourself.
3 Ways Studio Monitors Affect Sound Quality
There are a few ways stands impact the sound quality of your speaker system.
1. Vertical Positioning
First, they allow you to position the speakers so that the high frequency drivers are on-axis with your ears when you’re sitting in the listening position. Pointing the speakers directly at your ears optimizes the frequency balance.
High frequencies are more directional than low frequencies, so it may start to sound a bit muffled if the speaker isn’t pointed directly at you. That’s the case both vertically and horizontally. Stands allow you to elevate the speakers so that the high frequency drivers are at ear height.
2. Horizontal Positioning
Second, stands allow you to place the studio monitors in the optimal position horizontally. Try to form an equilateral triangle between the listening position and the two speakers. In other words, the distance between you and each speaker should be equal to the distance between the speakers. This will impact the stereo image, or the blend of each instrument between the left and right speaker that creates dimension within the soundstage.
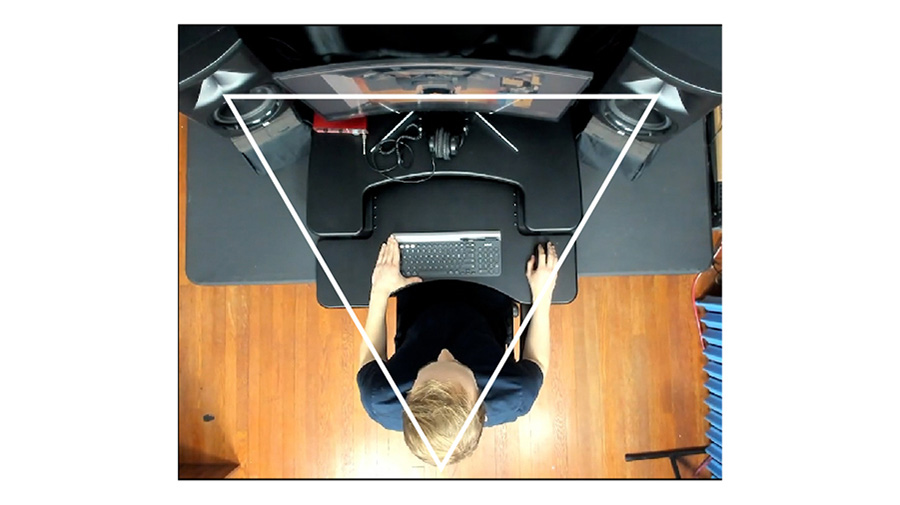
The distance between you and your studio monitors will vary depending on the studio monitors you’re using, the size of your room, and a number of other factors. For example, while it’s often difficult to avoid a reflection off of the desk, studio monitor stands could allow you to move the monitors further away so that the angle of the reflection becomes so obtuse that it no longer reflects sound to your ears. You want to avoid any reflections that you can, as they cause interference which negatively impacts the frequency response at the listening position.
3. Isolation
Third, stands help to isolate the studio monitors from the desk, floor, or wall. Let me show you what I mean with a demonstration. This is a transducer attached to a metal plate. When the transducer vibrates, it creates resonances within the metal plate at specific frequencies. You can see the sand gather where the plate isn’t vibrating. At these resonant frequencies, the sound of the plate vibrating becomes much louder.
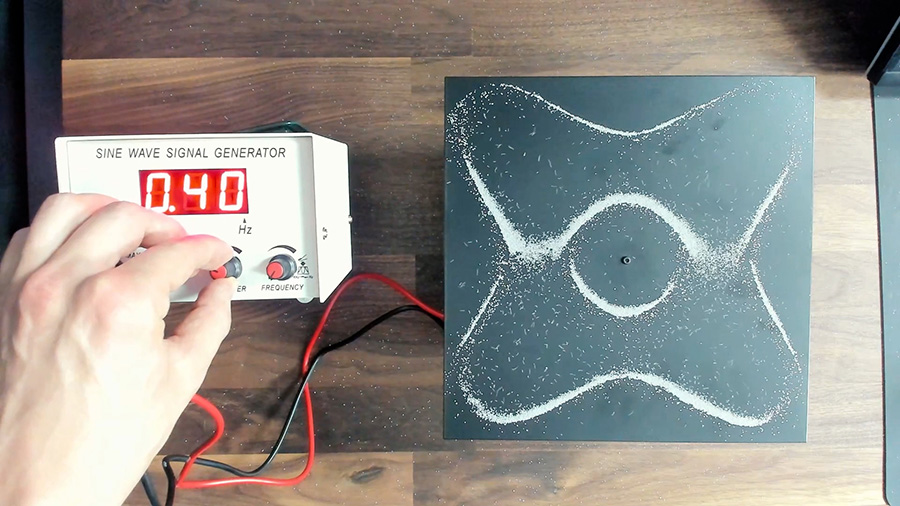
The same thing happens when you place your studio monitors directly onto a surface such as a desk or shelf without isolation. The desk, for example, will resonate at specific frequencies, which are determined by its size and shape. Those resonances will combine with the sound from the studio monitors themselves and will cause interference.
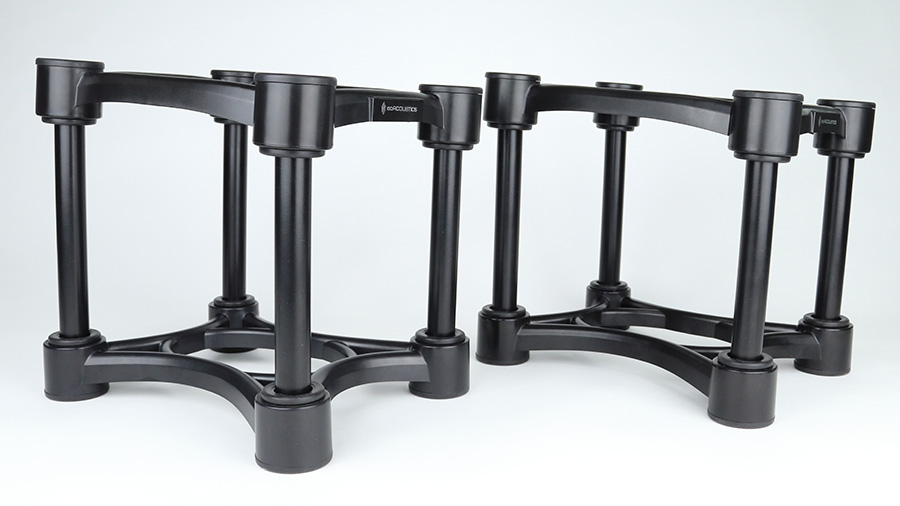
That’s why you’ll see features in these stands that aim to isolate the monitors and prevent energy from being transferred. Some stands reduce the transfer of energy with isolation pads and others by adding density to the stands.
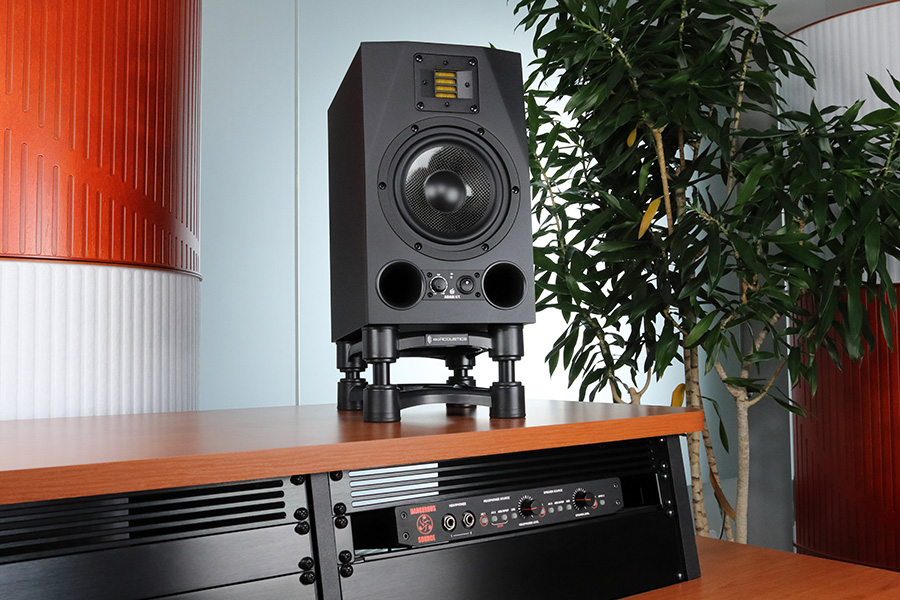
This brings me to the sponsor of this post, IsoAcoustics. No matter which stands you choose, you can use IsoAcoustics ISO stands or ISO-Pucks to fine-tune the positioning of your speakers and to isolate them. Here is an IsoAcoustics calculator that will help you choose the right isolation solution for your studio monitors: IsoAcoustics Calculator
Best Studio Monitor Stands
You can buy studio monitor stands from under $100 all the way up to these Sound Anchor stands at about $1,300 a pair, and beyond.
Ultimate Support MS-90
These Ultimate Support stands are the most high-quality pair that I’ll demonstrate in this post. They cost about $320 and have a few features that set them apart from the other options.
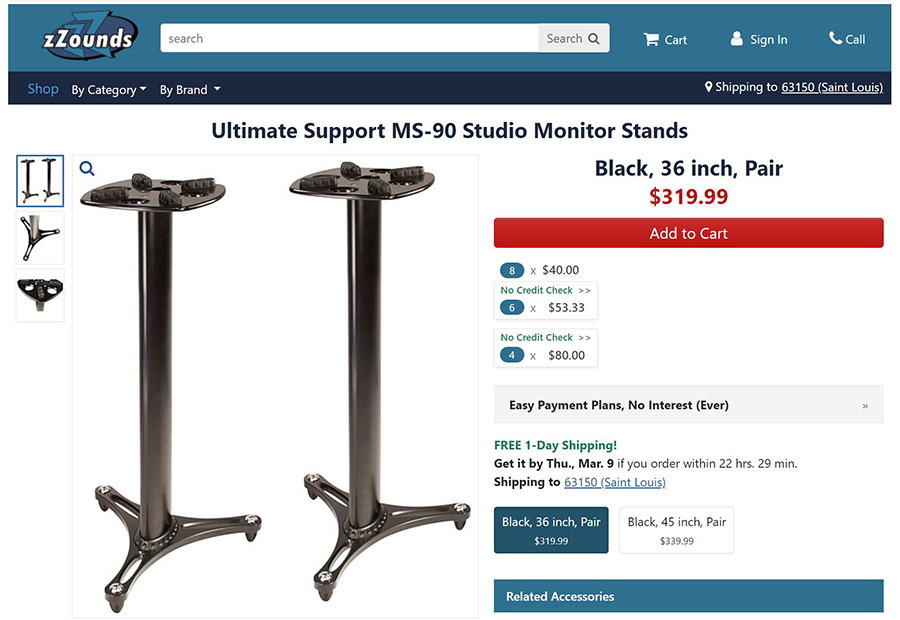
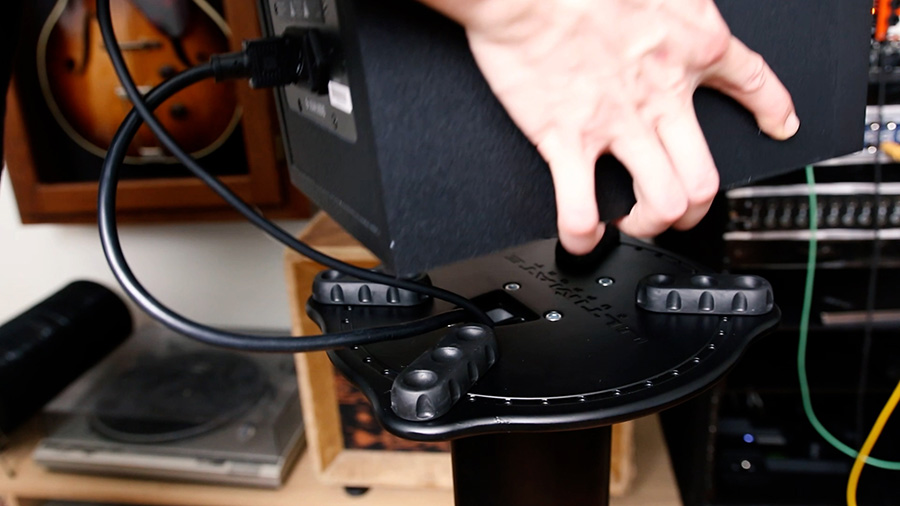
These stands have a fixed height at 36 inches for use with a standard-height chair. Although, you can also buy the taller 45-inch version if that suits your setup. The MS90B stands have some basic isolation pads here that aim to isolate vibrations and provide space below the speaker so that you can run cables through the channel within the stand. This keeps everything looking clean and tidy.
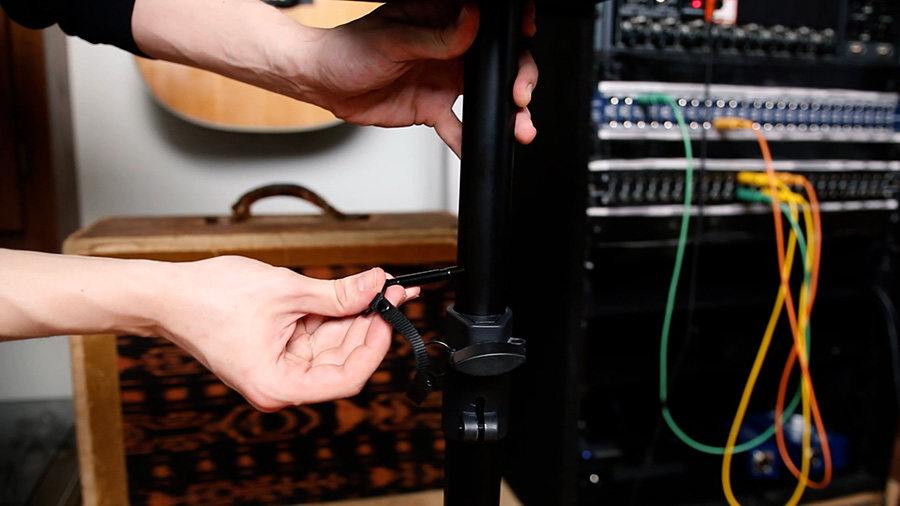
The larger channel in these stands is capped on each end, allowing you to add weight to the stand by filling it with sand or shot. This reduces the resonance of the stand itself and also helps to isolate the vibrations from being transferred to the floor.
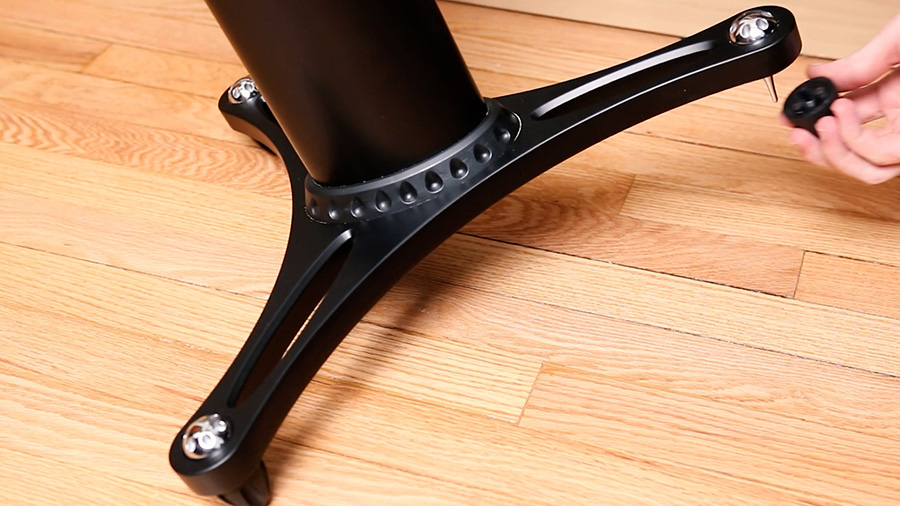
The Ultimate Support MS-series stands have a very low-profile base. The stands are sturdy on hard flooring using the rubber feet, or you can remove the rubber feet and use these spikes to maintain stability on carpet flooring.
On-Stage SMS6000
The second pair of stands that I’ve been testing are these On-Stage SMS6000 stands. They are less than half the price at just over $100 for a pair.
These stands have a height adjustment between 36” and 54” with a safety pin as a backup to the adjustment knob. They don’t offer any cable management through the column except for small little clips on the exterior. You also don’t have the option to fill these stands with sand as you would with the Ultimate Support stands.

There are some thin rubber pads on these stands, but they are more so to keep the speakers from sliding rather than to effectively isolate them. The bases on these stands also have rubber feet or carpet spikes but the triangular bases aren’t as low-profile as the tripod-style bases that we saw on the other stands.
Gator Frameworks GFWSPKSTMNDSKCMP
Finally, we’ve got these Gator Frameworks stands that attach to the edge of a desk or table rather than standing on the floor. The height of these stands vary between about 10” and 13”.
Using stands like these helps keep things off of the floor and can be very useful in small rooms where the desk needs to be as close to the wall as possible. But you will of course lose some desk space when using these, in addition to creating a very steep desk reflection.
IsoAcoustics ISO-200 & ISO-PUCK
Again, any of these stands can be paired with a pair of IsoAcoustics ISO-STANDs or a set of ISO-PUCKs. I’m currently using the ISO-STAND 200s with the Ultimate Support stands. But as you can see, I’ve removed the built-in isolation pads from the stands.
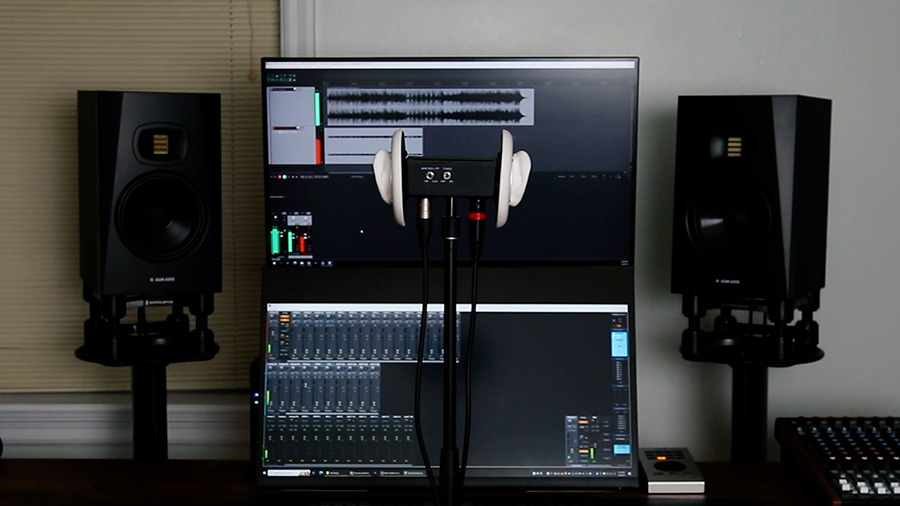
You can listen to the sound quality differences that can be expected with each of these in the video at the top of the page. Pay close attention to the bass in the examples, as well as the stereo image and separation between the left and right speaker.
The next post will help you to optimize the setup of your studio monitors so you can get the best sound possible: 3 Studio Monitor Setup Tips for a Better Mix