If you are interested in producing music, there has never been a better time to start! Modern technology has made it possible for anyone to create professional-quality music without investing thousands of dollars into a full studio.
You’ve just got to know how to get started – and that’s why I wrote this post for you.
In this post, you’ll learn about the most common methods for producing music in a home studio, the essential tools that you’ll need, and by the end you’ll be ready to create your first song – no matter what budget you’re working with.
First, I want to let you know that when you click the links in this post, a small portion of your purchase will go toward Audio University at no extra cost to you. I’m not sponsored by these companies – this is just a way to support the channel for helping you discover my favorite products. I really appreciate your support!
DAW (Digital Audio Workstation)
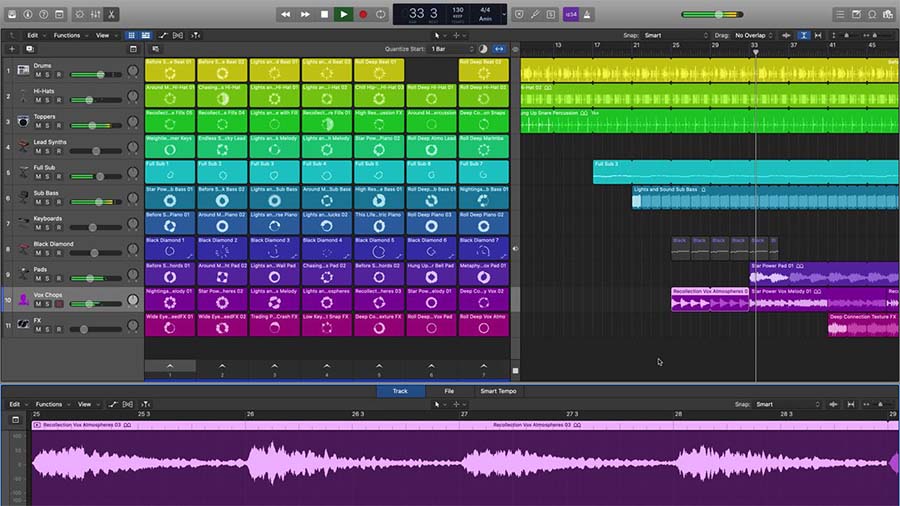
The most important component of a modern studio is the DAW, or Digital Audio Workstation. A DAW is kind of like the modern day tape machine.
With a DAW, you can record and layer sounds, edit or rearrange audio clips, and adjust the tone and balance of the audio using EQ, compression, reverb, or other effects plugins.
There are many DAWs available – all with their own unique workflows. Some of the most popular options include ProTools, Logic Pro, Ableton, and Nuendo just to name a few – but there are so many more.
There are even some DAWs available to download for free like GarageBand, REAPER, and Audacity.
My recommendation is to get started with one of the free options until you get a feel for how you’ll use the software. By then, you’ll have a better understanding of which paid option would be the right fit for you.
Recording Instruments, Vocals, & Microphones
Let’s say you want to record your guitar and sing. For that, you’ll need a device called an audio interface.
An audio interface lets you connect instruments and microphones to your computer for recording into your DAW. It also allows you to connect your computer to studio monitors or headphones to playback what you’ve recorded.
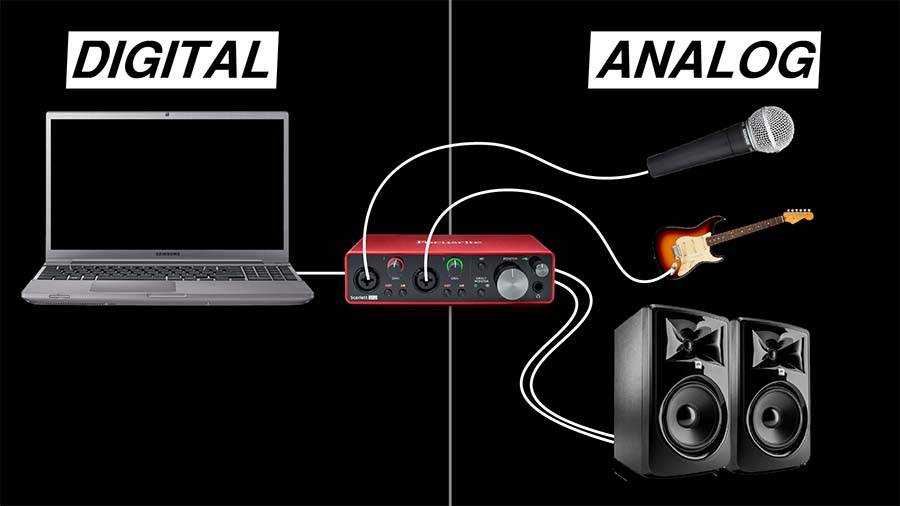
There are lots of different interfaces out there, from under $200 to over $2000. My number one recommendation for most people getting started is the Focusrite Scarlett 2i2 or Focusrite Scarlett 4i4.
These interfaces are very affordable and give you the essential inputs and outputs needed for creating music as a solo musician.
If you want to record a full band with a drum kit, you might want to look into an interface with more inputs. In this Audio University video, I’ll show you what you should consider when shopping for the right audio interface:
Drum Loops, Virtual Instruments, & MIDI
One of the most popular and affordable ways to create music with a DAW is by using virtual instruments.
There are thousands of virtual instruments out there – from virtual drums, pianos, and bass guitars to synthesizers or anything else you can imagine.
Virtual instruments are usually controlled by MIDI, which stands for Musical Instrument Digital Interface. With MIDI, you can create and edit the notes that will play through the virtual instrument, like the pitch and other characteristics.
If you’re working on a $0 budget, you can theoretically draw in the individual notes using the MIDI editor in your DAW, but it’s a lot easier to use a MIDI controller.

MIDI controllers come in many shapes and sizes, but most commonly come in the form of a keyboard. By connecting a MIDI keyboard to my computer with a USB cable, I can control the virtual instruments in my DAW.
It’s amazing what’s possible with just a MIDI keyboard and a DAW! These two components are a great place to get started producing music.
One of the most popular MIDI controllers is the Akai MPK Mini MK3. It gives you some drum pads and a 25-key keyboard. I think this is a good starting point for most people.
As you can see in the video at the top of the page, this is a really fun process and it’s all possible with a DAW, a few plugins, and a MIDI controller.
You can learn more about MIDI in this post by Audio University that explores Making Music With MIDI.
Mixing & Mastering
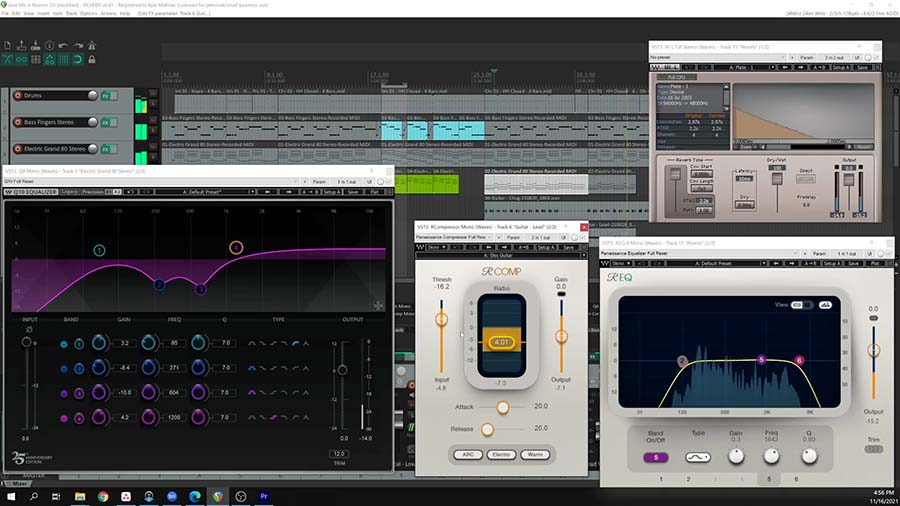
Once you’ve recorded each instrument, the next step will be to mix the instruments together to create a good balance. This can all be done inside of your DAW, using plugins.
Most DAWs come with the basic plugins built in, like EQ, compression, gates, reverb and delay. As you continue to improve your skills, you may want to consider buying a few third-party plugins to expand your tool kit. You just download the plugin from an online store and load it into your DAW.
It’s important to have a decent pair of speakers or headphones for mixing music – the speakers in your laptop don’t really give you the full picture.
I’d recommend starting with a pair of studio headphones. There are some great options around $150, like the Audio-Technica M50x or the Beyerdynamic DT770 Pro.
You can also consider getting a pair of studio monitors, but headphones will cover you if you’re on a strict budget. If you do decide to buy some studio monitors, my recommendation is to get a pair of ADAM T7V or JBL 308P. These are a good value for the money.
Recording Studio Essentials Checklist
Music production doesn’t have to be confusing or expensive. There are a lot of companies out there that want to sell you more and more gear, but a lot of it isn’t necessary when first starting out.
I’ve created a studio equipment checklist that lays out the 6 essential components of any studio.
You can find that checklist at audiouniversityonline.com/free-home-studio-checklist/ or with this form: