The best way to improve your mixes is to improve your ears. The better you are at listening, the better your mixes will be.
Although simply listening to great recordings is an effective way to improve your listening ability over time, there is a technique to train your ability to objectively identify frequencies and frequency bands much more quickly.
In this post, you’ll learn this technique. Fair warning: it might change the way you listen forever…
Although simply listening to great recordings is an effective way to improve your listening ability over time, there is a technique to train your ability to objectively identify frequencies and frequency bands much more quickly.
By the way, if you want to get started right away with the ear training method in this post, I want to give you a free guide. It includes simple steps, references, and links to a free tool that you can start putting into practice in minutes. Download the guide here: Ear Training Quick Start Guide
Benefits of Ear Training
The language around audio mixing is typically very subjective. We use words like “boomy”, “boxy”, “woofy”, or “tinny” to describe the timbre, or unique tone, of a sound.
Despite the value of these words in normal conversation, they are not quantitative. They leave too much room for interpretation and miscommunication in professional settings.
The tools we use do not speak the subjective language of humans. As engineers, we need to translate our subjective experience into objective terms so that we can use the tools available to us.
Finding the right frequencies was mostly a guessing game during my first few years of recording and producing music. Eventually, I learned the trick where you sweep for frequencies with a parametric EQ until you hear the problematic frequency and then take it out with the EQ.
The “EQ sweep” technique is useful and I still use variations of it every once in a while, but you’ve got to be careful when using that method.
Applying a 12dB boost to anything is bound to make it sound terrible, so it can become a very slippery slope when you go hunting for problems that aren’t there. Plus, sweeping for frequencies in live sound is often not acceptable during a performance.
We must develop an ability to hear and fix imbalances in timbre quickly. The ear training method discussed in this post will empower you with these abilities by developing a memory to identify specific frequency bands.
Imagine how much more efficiently you could mix if, instead of sweeping the equalizer to find the origin of the “muddiness”, you could confidently attenuate 200Hz by -6dB.
Not only that, but identifying frequencies by ear an essential skill for live sound engineers who need to quickly ring out microphone feedback through stage monitor wedges before a performance.
Tools for Ear Training
Online Software
The single best tool for training your ears with this method is available for free at webtet.net. I created a FREE Quick Start Frequency Guide to help you get started using this software that you can download here.
Using this online tool, you can practice this method of ear training with pink noise or load your own audio file. It is a software created by Jason Corey.
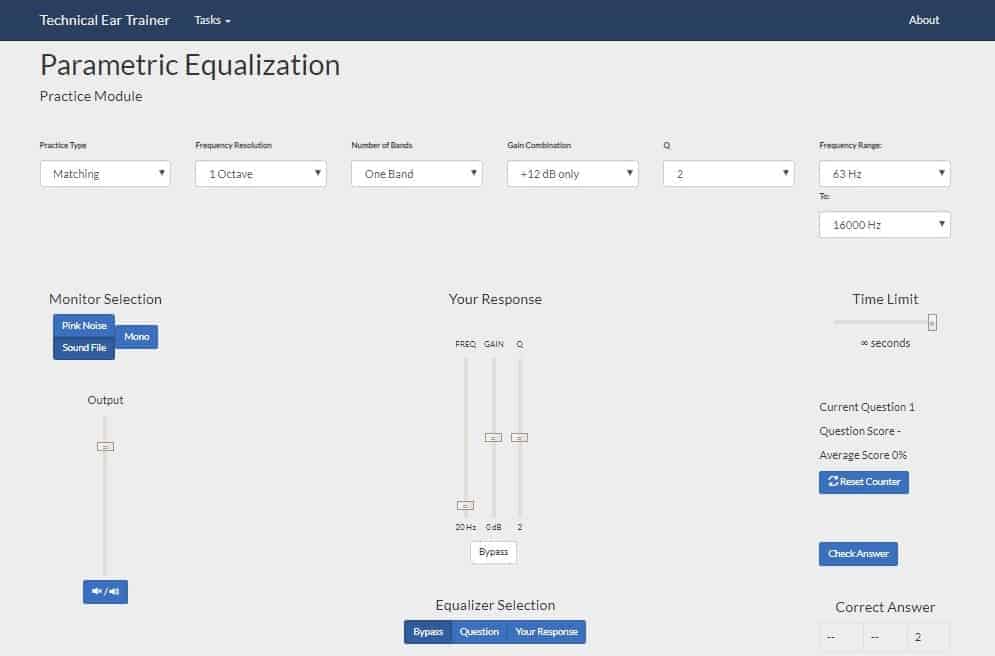
I cannot express how useful this tool has been to me. Whether you want to improve your ears for recording, system tuning, live sound, or mixing, this is an extremely valuable tool.
Training Your Ears
One of the greatest tricks I have ever learned is to listen for various vowel and consonant sounds to identify frequencies. This realization has unlocked a completely new way of listening in my mind, and therefore a new way of mixing.
Each sound in human speech correlates to a set of frequencies within the human hearing range. This seems obvious, but the correlation is actually much more orderly than you’d expect. This can be used to our advantage. We can develop reference points in our minds to attach the sound of each vowel or consonant to a specific frequency band.
To demonstrate these reference points, I will offer clips of filtered pink noise. Each filter will be boost a specific frequency +12 dB.
The center frequencies will be the ISO standard ⅓-octave frequencies: 250Hz, 315Hz, 400Hz, 500Hz, 630Hz, 800Hz, 1kHz, 1.25kHz, 1.6kHz, 2kHz, 2.5kHz, 3.15kHz, 4kHz, 5kHz, 6.3kHz, 8kHz, 10kHz, 12.5kHz and 16kHz.
For comparison’s sake, we will listen to pink noise unfiltered and then add an equalization filter to hear the difference. It’s important to listen to the flat, unfiltered pink noise consistently throughout training because our echoic memory is very short.
This means that after just a few seconds of listening to filtered pink noise, it begins to sound normal. Take the following optical illusion as an example of why it’s important to consistently remind yourself of unfiltered pink noise:
Training Your Ears to Hear With Octave Resolution
We will divide the spectrum of human hearing into octaves at first. Once you get a feel for hearing octaves, we can move deeper by listening for the ⅓-octave intervals between them. The following sounds will act as reference points for hearing frequency bands with one-octave resolution.
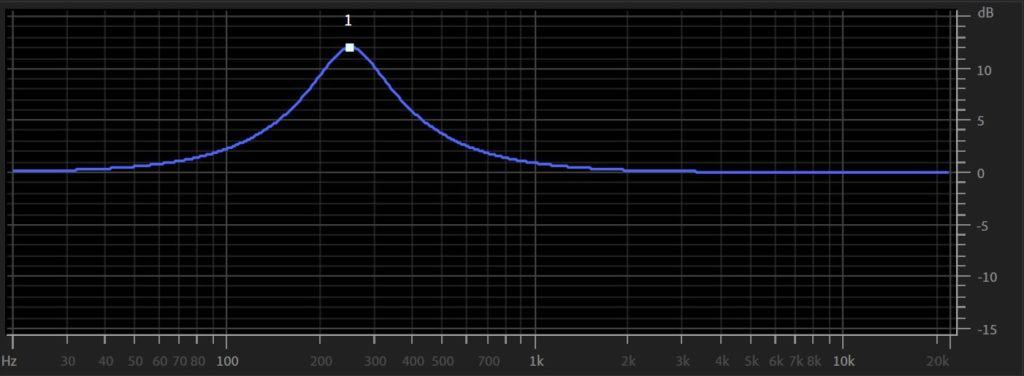
250 Hz – “U”
250Hz can be identified by an “u” or “oo” sound, as in “food”. If a mix contains an excessive amount of frequencies near 250Hz, it might sound “muddy”.
Listen to this clip of pink noise before and after a 12dB boost at 250Hz:
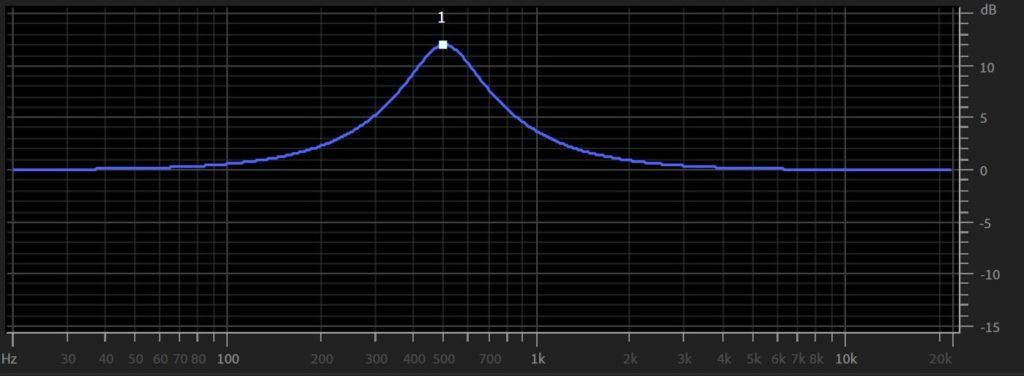
500 Hz – “O”
500Hz can be identified by an “o” sound, as in “no”. If too much energy exists in this range, a mix might sound “woofy”.
Listen to this clip of pink noise before and after a 12dB boost at 500Hz:
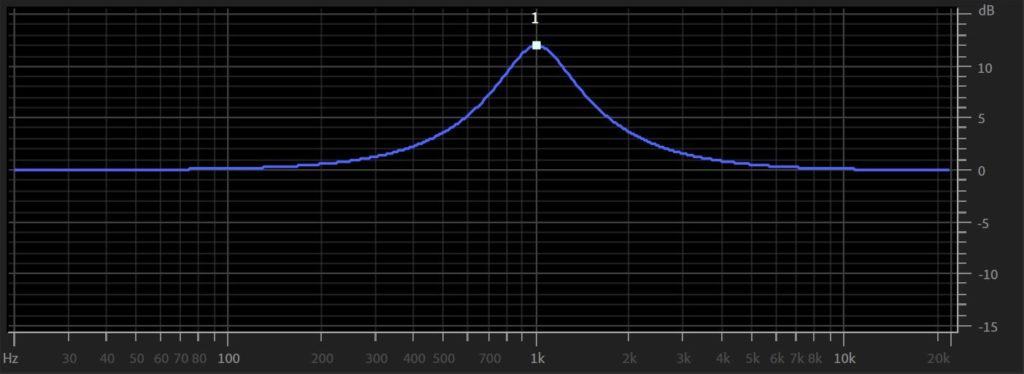
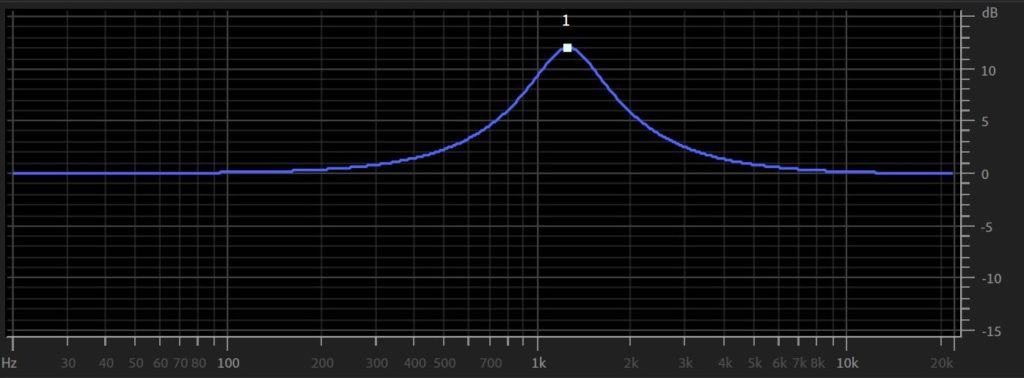
1 kHz – “AH”
1kHz can be identified by an “ah” sound, as in “aha”. If your mix has too much information in this range, it will sound “boxy”.
Listen to this clip of pink noise before and after a 12dB boost at 1kHz:
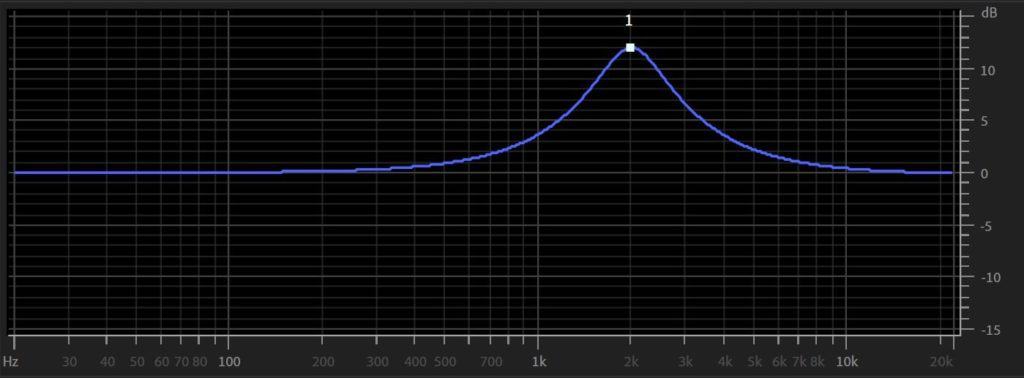
2 kHz – “EH”
2kHz can be identified by an “eh” sound, as in “let”. Mixes with too much 2kHz will sound “bitey” and listeners might have difficulty hearing the vocalist if there are instruments competing for frequencies in this range.
Listen to this clip of pink noise before and after a 12dB boost at 2kHz:
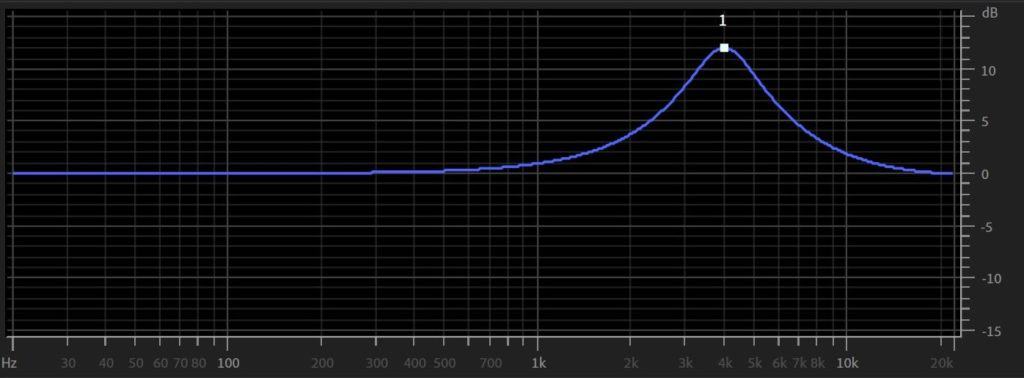
4 kHz – “EE”
4kHz can be identified by an “e” or “ee” sound, as in “bee”. The human ear is most sensitive to frequencies near 4kHz. These frequencies are also very important for hearing and understanding human speech. If a mix has too much 4kHz, it might sound “tinny”.
Listen to this clip of pink noise before and after a 12dB boost at 4kHz:
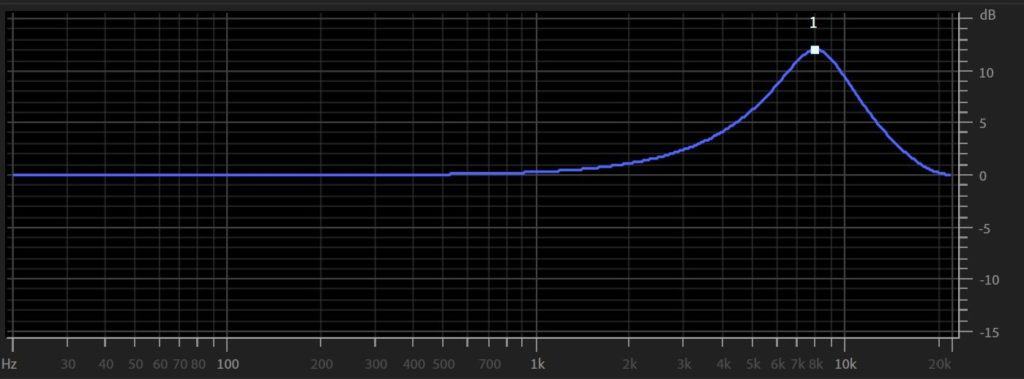
8 kHz – “S”
As we move toward the high frequencies, the vowel sounds begin to be replaced by sibilant sounds. 8kHz can be identified by an “s” sound, as in “sam”. Too much 8kHz in a mix can be quite uncomfortable to listen to. The subjective word to describe this range might be “crispy”.
Listen to this clip of pink noise before and after a 12dB boost at 8kHz:
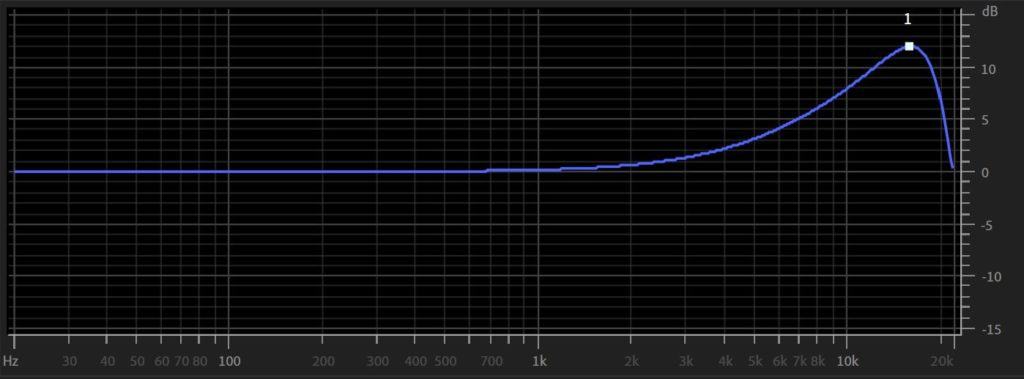
16 kHz – “Ts”
16 kHz can be identified by a sibilant sound, as well. However, it takes on a more abrasive quality of “ts”, as in “tsunami”. If there is too much energy at these very high frequencies, a mix will have too much “shimmer”.
Listen to this example of pink noise before and after a 12dB boost at 16kHz:
Training Your Ears to Hear With ⅓-Octave Resolution
After a little practice with the octave reference points described above, you will be able to move on to identifying frequencies with ⅓-octave resolution. To do this, we will utilize the reference points we have developed in the above section.
315 Hz & 400 Hz
We have already established an association of the sound “U” with 250Hz and “O” with 500Hz. To identify the ⅓-octave frequencies between them, 315Hz and 400Hz, we will use “U” and “O” as references.
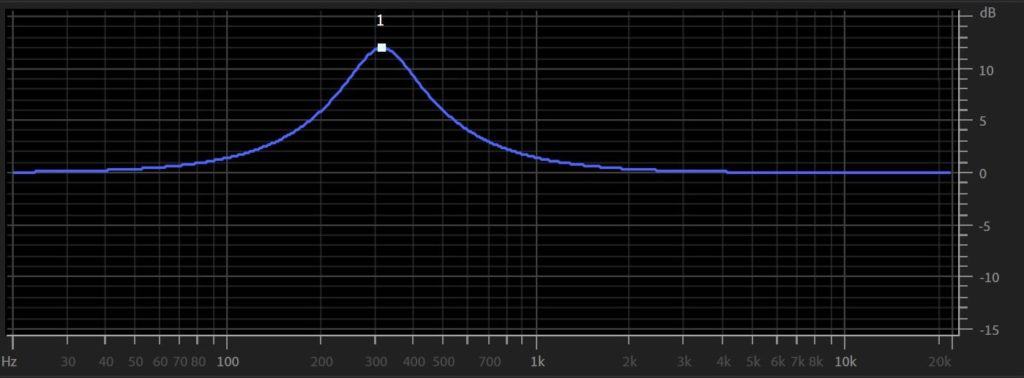
315 Hz
315Hz is identified by 2 parts “U”, 1 part “O”. Listen to this example of pink noise before and after a 12dB boost at 315Hz:
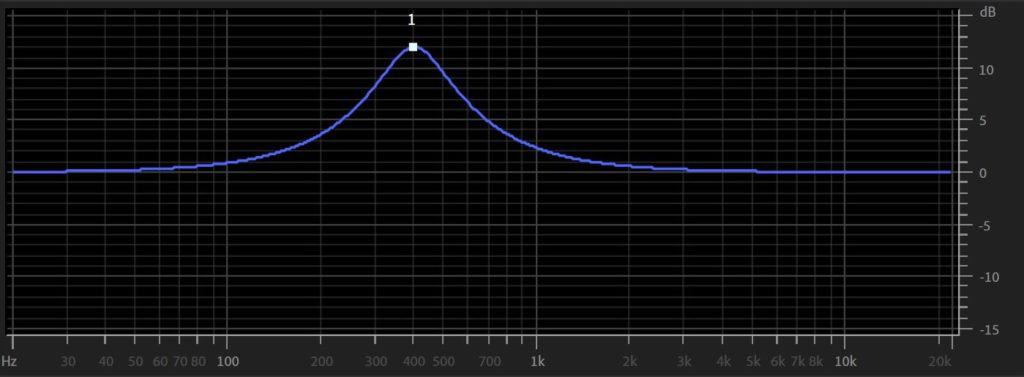
400 Hz
400Hz is identified by 1 part “U”, 2 parts “O”. Listen to this example of pink noise before and after a 12dB boost at 400Hz:
630 Hz & 800 Hz
We have already established an association of the sound “O” with 500Hz and “AH” with 1kHz. To identify the ⅓-octave frequencies between them, 630Hz and 800Hz, we will use “O” and “AH” as references.
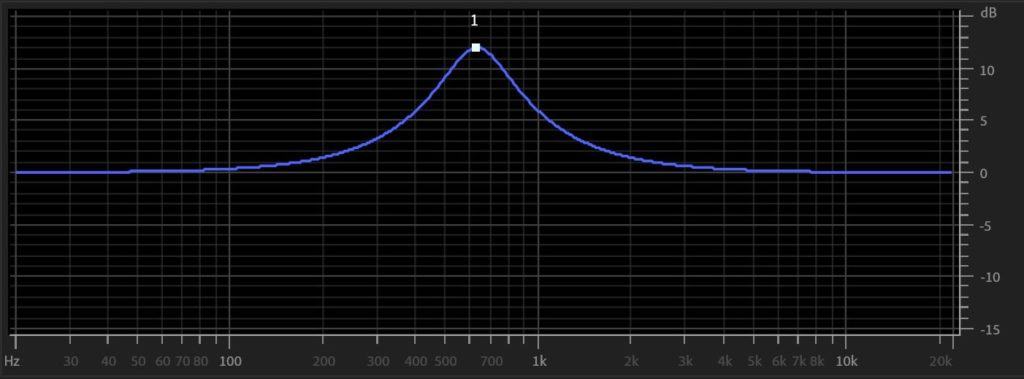
630 Hz
630Hz is identified by 2 parts “O”, 1 part “AH”. Listen to this example of pink noise before and after a 12dB boost at 630Hz:
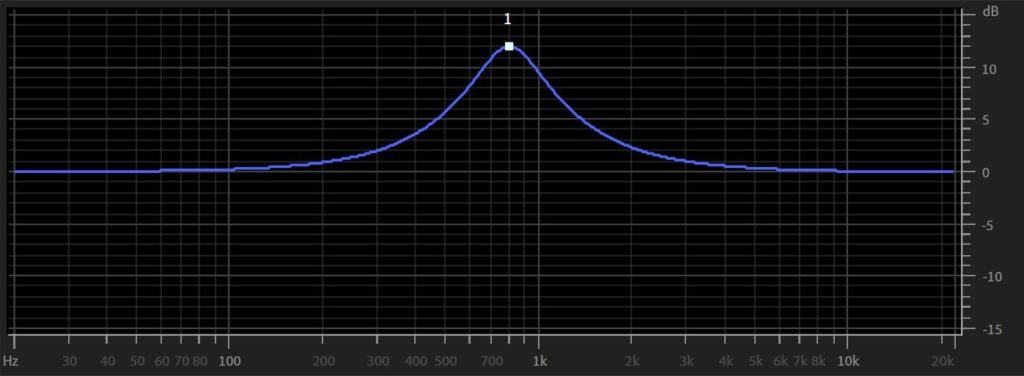
800 Hz
800Hz is identified by 1 part “O”, 2 parts “AH”. Listen to this example of pink noise before and after a 12dB boost at 800Hz:
1.25 kHz & 1.6 kHz
We have already established an association of the sound “AH” with 1kHz and “EH” with 2kHz. To identify the ⅓-octave frequencies between them, 1.25kHz and 1.6kHz, we will use “AH” and “EH” as references.
1.25 kHz
1.25kHz is identified by 2 parts “AH”, 1 part “EH”. Listen to this example of pink noise before and after a 12dB boost at 1.25kHz:
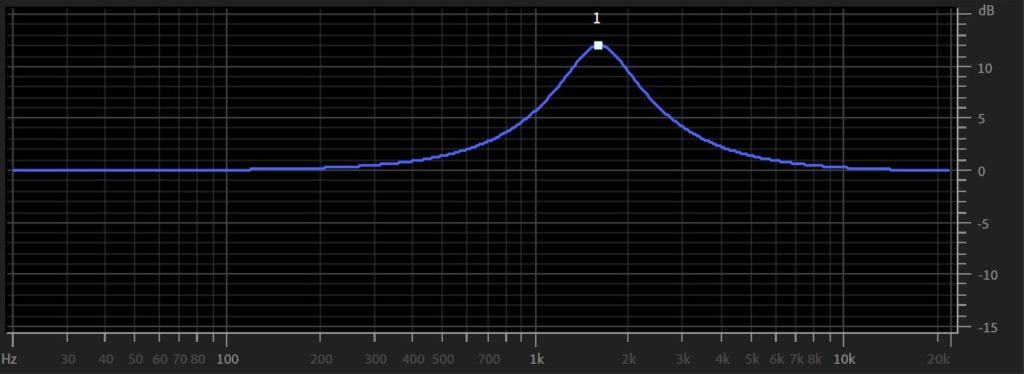
1.6 kHz
1.6kHz is identified by 1 part “AH”, 2 parts “EH”. Listen to this example of pink noise before and after a 12dB boost at 1.6kHz:
2.5 kHz & 3.15 kHz
We have already established an association of the sound “EH” with 2kHz and “E” with 4kHz. To identify the ⅓-octave frequencies between them, 2.5kHz and 3.15kHz, we will use “EH” and “E” as references.
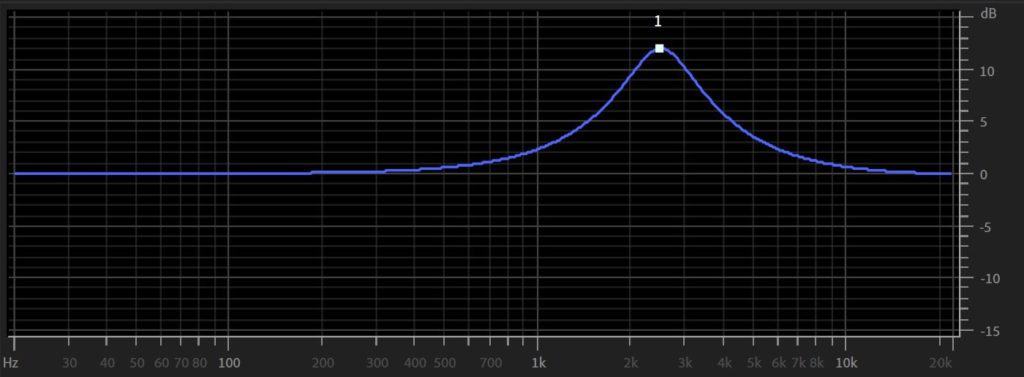
2.5 kHz
2.5kHz is identified by 2 parts “EH”, 1 part “E”. Listen to this example of pink noise before and after a 12dB boost at 2.5kHz:
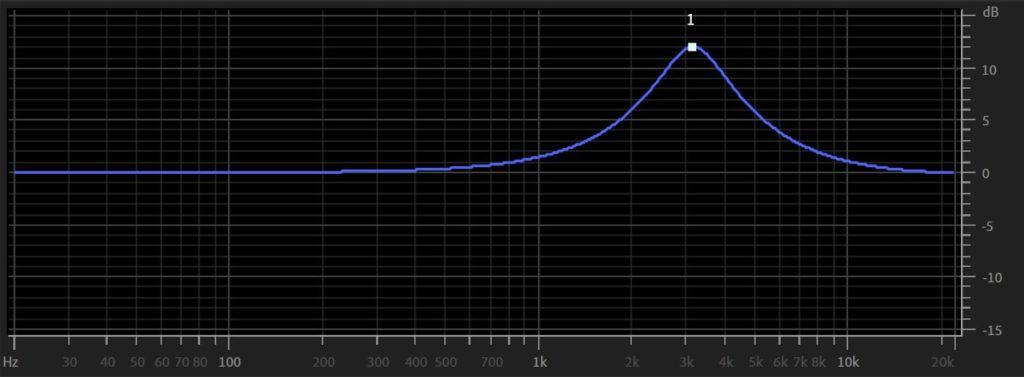
3.15 kHz
3.15kHz is identified by 1 part “EH”, 2 parts “E”. Listen to this example of pink noise before and after a 12dB boost at 3.15kHz:
5 kHz & 6.3 kHz
We have already established an association of the sound “E” with 4kHz and “S” with 8kHz. To identify the ⅓-octave frequencies between them, 5kHz and 6.3kHz, we will use “E” and “S” as references.
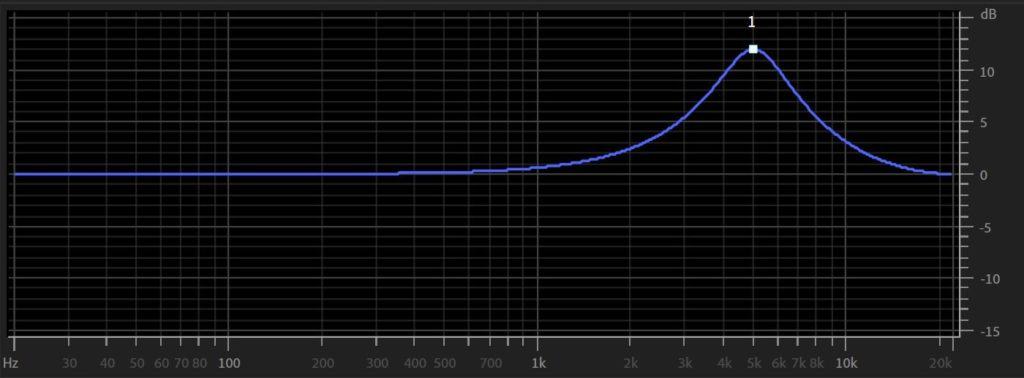
5 kHz
5kHz is identified by 2 parts “E”, 1 part “S”. Listen to this example of pink noise before and after a 12dB boost at 5kHz:
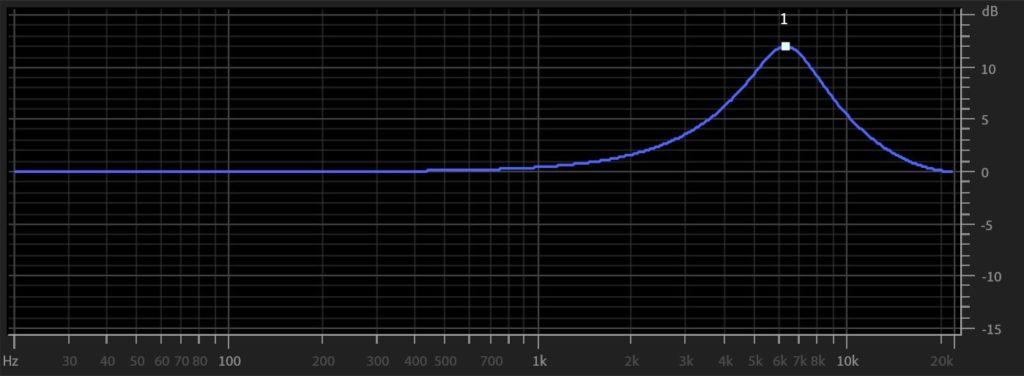
6.3 kHz
6.3kHz is identified by 1 part “E”, 2 parts “S”. Listen to this example of pink noise before and after a 12dB boost at 6.3kHz:
10 kHz & 12.5 kHz
We have already established an association of the sound “S” with 8kHz and “TS” with 16kHz. To identify the ⅓-octave frequencies between them, 10kHz and 12.5kHz, we will use “S” and “TS” as references.
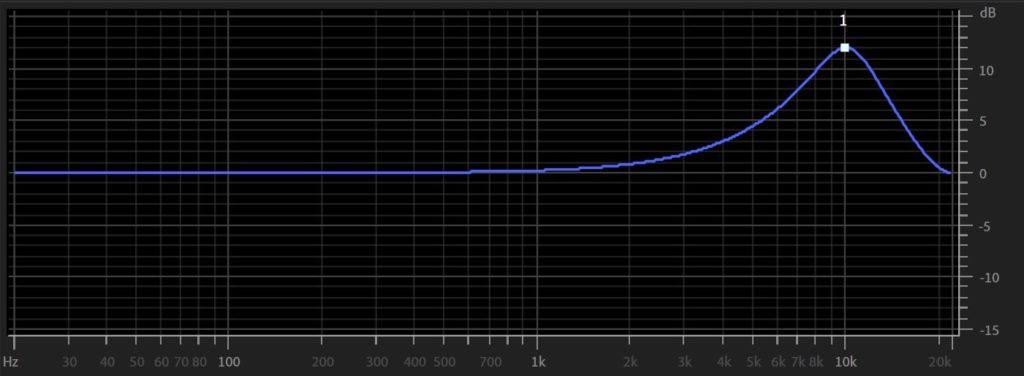
10 kHz
10kHz is identified by 2 parts “S”, 1 part “TS”. Listen to this example of pink noise before and after a 12dB boost at 10kHz:
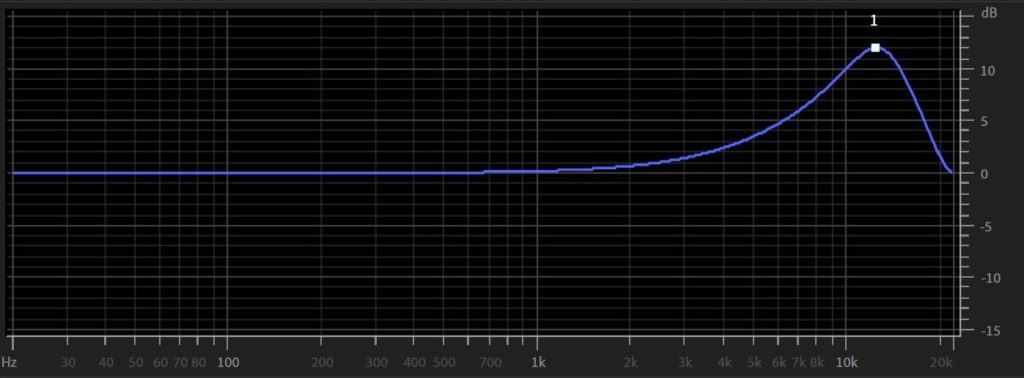
12.5 kHz
12.5kHz is identified by 1 part “S”, 2 parts “TS”. Listen to this example of pink noise before and after a 12dB boost at 12.5kHz:
Frequencies Are Objective, Adjectives Aren’t
As you might be able to tell by my choice of subjective words, such as “”woofy”, “boxy”, and “tinny”, we each define these words very differently. You may completely disagree with some of my word choices. This fact alone is enough to prove the inefficacy of subjective words to communicate about sound. This is especially true in a professional setting.
A much better method is to define sounds by their frequency composition. As you develop an ability to recognize these sounds in the above examples with pink noise, you will create memory of reference points in your mind for which sound represents which frequency. As you refine these reference points, you will improve your ability to reliably and objectively identify the frequencies you’re hearing.
Practical Listening
Practicing with pink noise is very helpful at first, but not at all realistic. In a mixing situation, you will not be given a comparison of flat pink noise to filtered pink noise, but will need to hear a recording and determine which frequencies are overrepresented. We must continually refine these references in our mind until we are able to hear them in real-world content, such as music and speech.
This video offers a few practical examples to help you understand how practicing this method will actually help you in a mixing situation.
Remember – If you want to get started right away with ear training, download the free guide here: Ear Training Quick Start Guide