Acoustic treatment is one of the most effective ways to improve the sound quality of your sound system.
Your system is only as good as the weakest link in the signal chain, and for most people, the weakest link is the acoustic quality of their room. Your speakers may output extremely high-fidelity sound, but comb filtering, room modes, and reverberation diminish the sound quality for the listener.
Luckily, with a few strategically placed sound absorption panels, you can significantly improve the listening experience.
In this post, I’m going to show you how to build acoustic panels that cost less than what you’d pay for professionally made panels. If you’re willing to spend a little extra money to save some time, you can check out my top recommendation for pre-made acoustic panels.
Materials & Tools
There are a few things you’ll need in order to build these panels.
I’ve created a full kit that will make it easy for you to get everything you need for this project. Using these links supports Audio University at no extra cost to you.
Tools
- Drill
- Small drill bit for pilot holes
- Phillips-head screwdriver bit for drill
- Saw (handheld or electric)
- Tape measure
- Staple gun
Materials
- (2) 1″x8″x8′ boards of wood
- (2) yards of duck canvas fabric
- (1/6th) bag of Rockwool Safe & Sound Insulation
- (30) 1-⅝” #6 wood screws
- Staples for Staple Gun
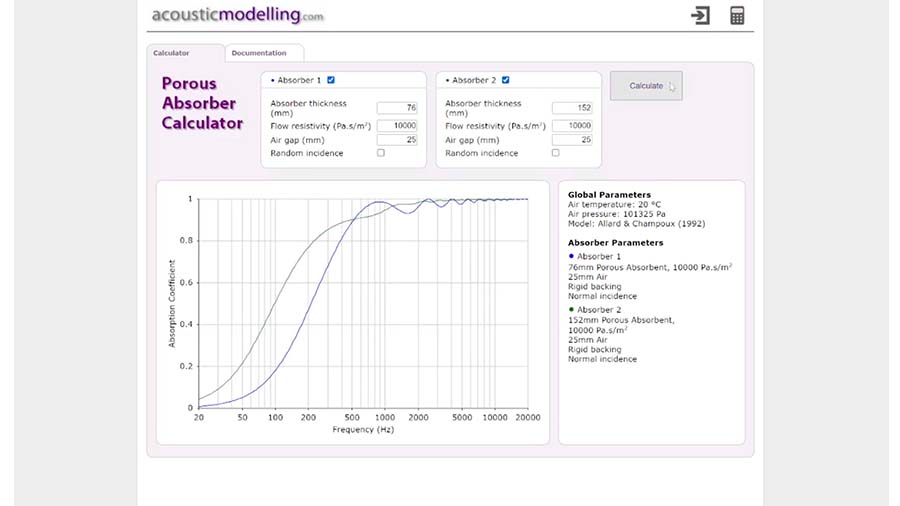
How Deep Should My Acoustic Panels Be?
The type of wood you’ll buy depends on the depth of the panels you want to make.
Shallow panels only absorb mid and high frequencies, so I wouldn’t recommend choosing wooden boards less than 4 inches in depth.
This porous absorber calculator will help you compare the effectiveness you can expect with various depths.
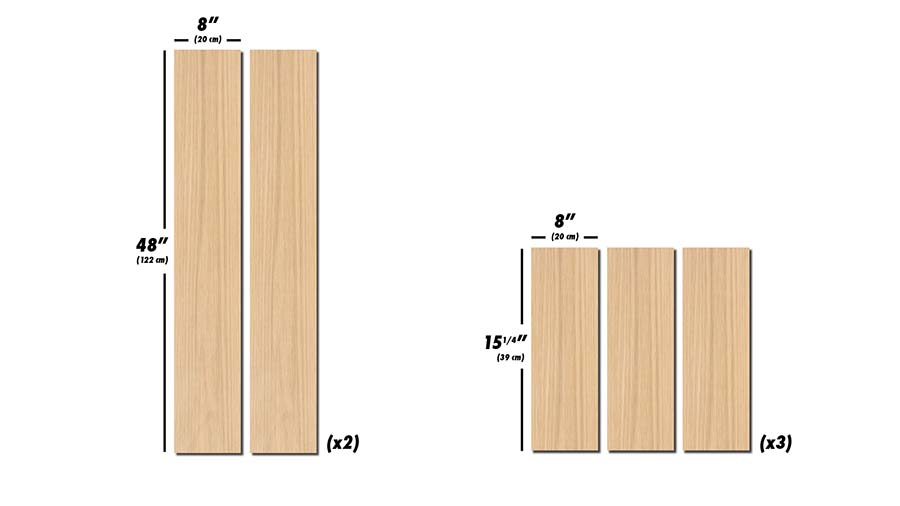
Step 1: Cut The Wood
The first step is to cut the wood to make a frame. We’ll be building a frame that can surround a 15.25”x47” panel of insulation.
Choose whichever frame dimensions that make the most sense for your insulation, aiming for a snug fit around the insulation without compressing it.
You’ll need 2 long boards and 3 short boards.
Once you’ve made the cuts, go ahead and set them aside.
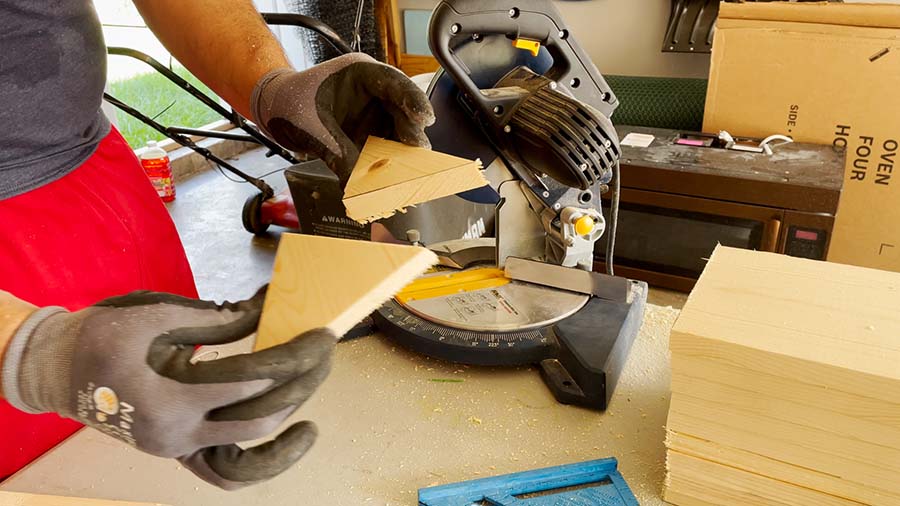
Next, you’ll need some corner braces. This can be done by cutting some scrap wood into right triangles.
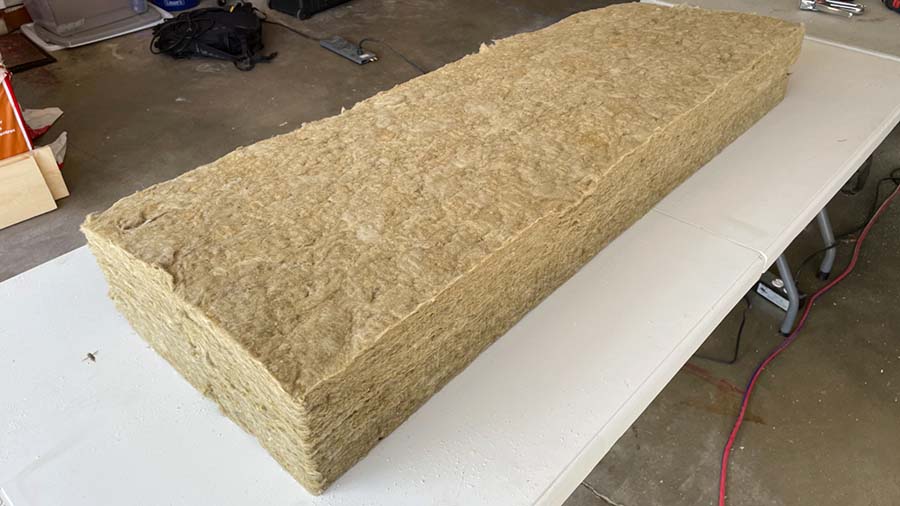
Step 2: Prepare The Insulation
The next step is to prepare your insulation. Remember, I’m building an 8-inch deep panel, so I’ll use (2) 3-inch deep pieces of insulation.
This extra space will accomplish a few things… It will leave some room to install the braces later on, it will provide space for the mounting hardware, and it will create a small air gap. The air gap can expand the effectiveness of the panel down to lower frequencies.
If you’re building 4-inch panels, you will only need (1) sheet of 3-inch insulation.
Go ahead and lay out the insulation on the floor or on a work table.
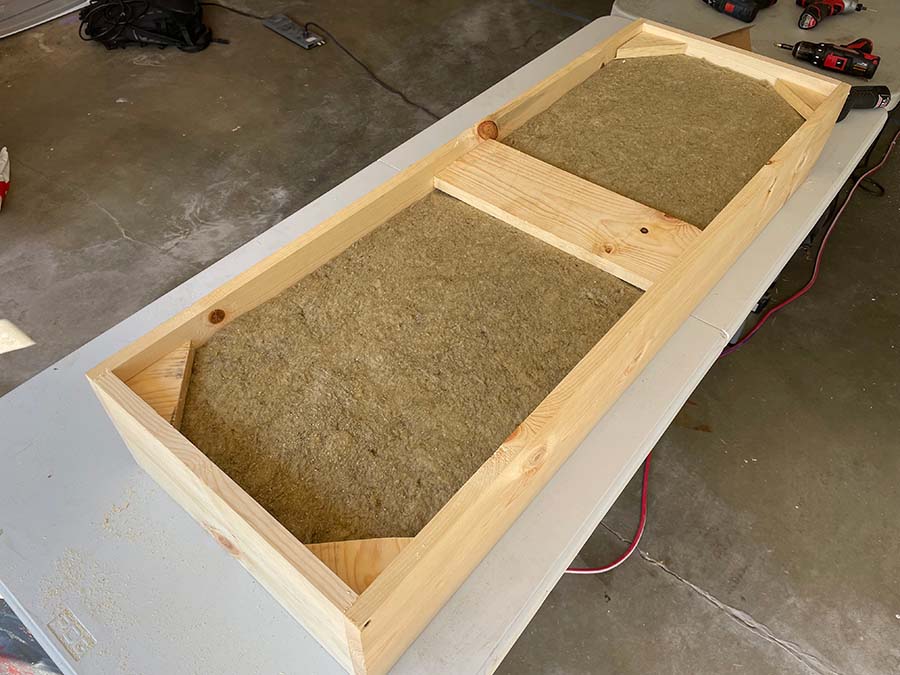
Step 3: Build The Frame
Now, we will build the frame around the insulation.
Take the two short boards and place them on the top and bottom of the insulation. Then sandwich the short boards and the insulation between the two long boards.
Before fastening them together with wood screws, create pilot holes with your drill bit. This will help to ensure that the wood doesn’t split when you install the wood screws. I’d recommend using two screws on each joint.
Next, do the same thing with the corner braces and the center brace.
Once that’s complete, you’ll have a completed frame.
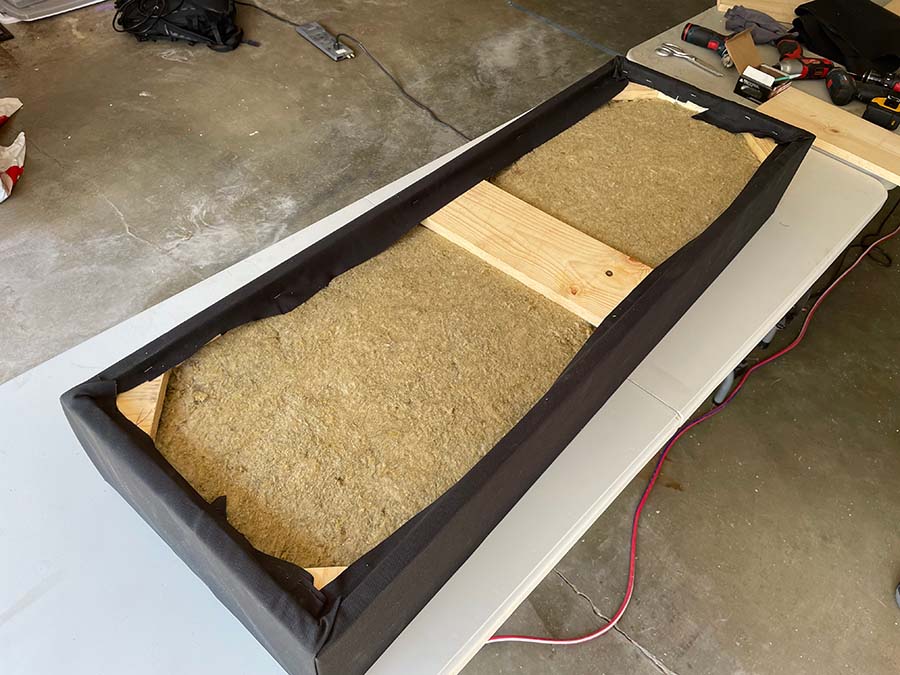
Step 4: Wrap The Panel With Fabric
Pick up the frame and slide the fabric underneath it. Position the frame so that the fabric wraps around the back of the frame on all sides.
Cut the fabric to the right dimensions, so that you can secure the fabric to the inside of the frame using a staple gun.
On the short sides, you’ll need to fold the fabric so that it lays flat.
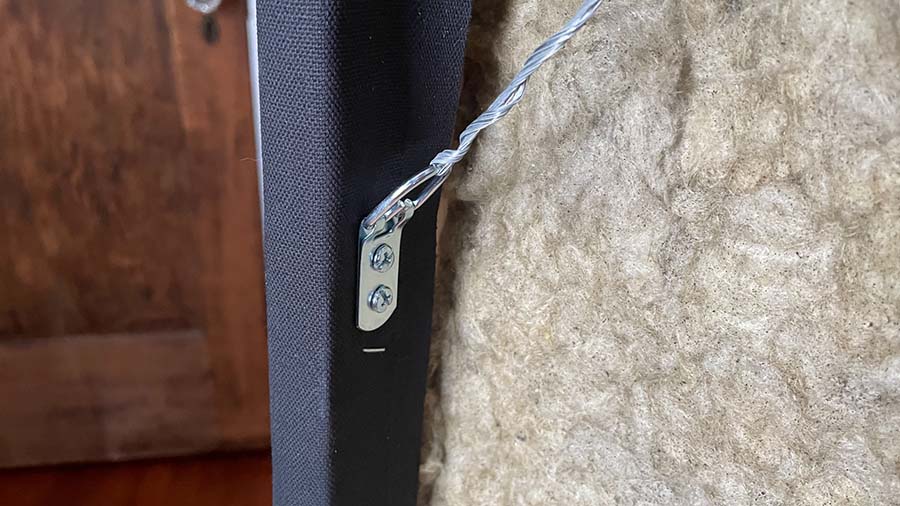
Step 5: Install Mounting Hardware
There are several ways to mount these panels to the wall.
My suggestion is to get some hanging wire and hardware like this kit.
You just want to make sure that the wire is the same length for each panel you make. That will help to mount your panels evenly in your room.
If you plan to mount the panels to the ceiling, here is a link to the mounting solution that I would recommend.