There’s a common misunderstanding about stems and tracks in audio production…
Many people use the terms “stems” and “tracks” interchangeably, but in reality they are quite different. In this post, I’ll help you understand the difference.
Exporting Tracks
If someone says “Send me the tracks for this song”, they probably want the raw recorded files for each individual instrument.
This means they want individual audio files for each track in the session: kick, snare top, snare bottom, overhead left, overhead right, guitar, lead vocal, background vocal, etc. Every track should be exported as a separate file.
If someone plans to mix your existing recordings, they probably want tracks. While you could theoretically send this person the whole project folder (with audio files and a DAW project file), it’s probably best to send them the tracks instead, because they may not use the same DAW as you use or they may use the same DAW but want to structure the session in a template file.
This person will receive those files and drag them into a new session within their DAW. To help ensure the files are properly synchronized once pulled into the session, it’s important that all of the audio files are equal in length. The DAW will line up the beginning of the files, so if they are all the same length, the start and end should line up perfectly.
Because you’ll be exporting RAW tracks, you’ll need to bypass all of the FX in your session and reset the panning and faders to 0.
However, you may want to include some plugins if they are essential to the sound. For example, if your guitar sound depends on an amp simulator plugin, you’ll probably want to keep the amp simulator plugin inline rather than sending the DI guitar track alone. Or, better yet, you might just duplicate the track and send one of each.
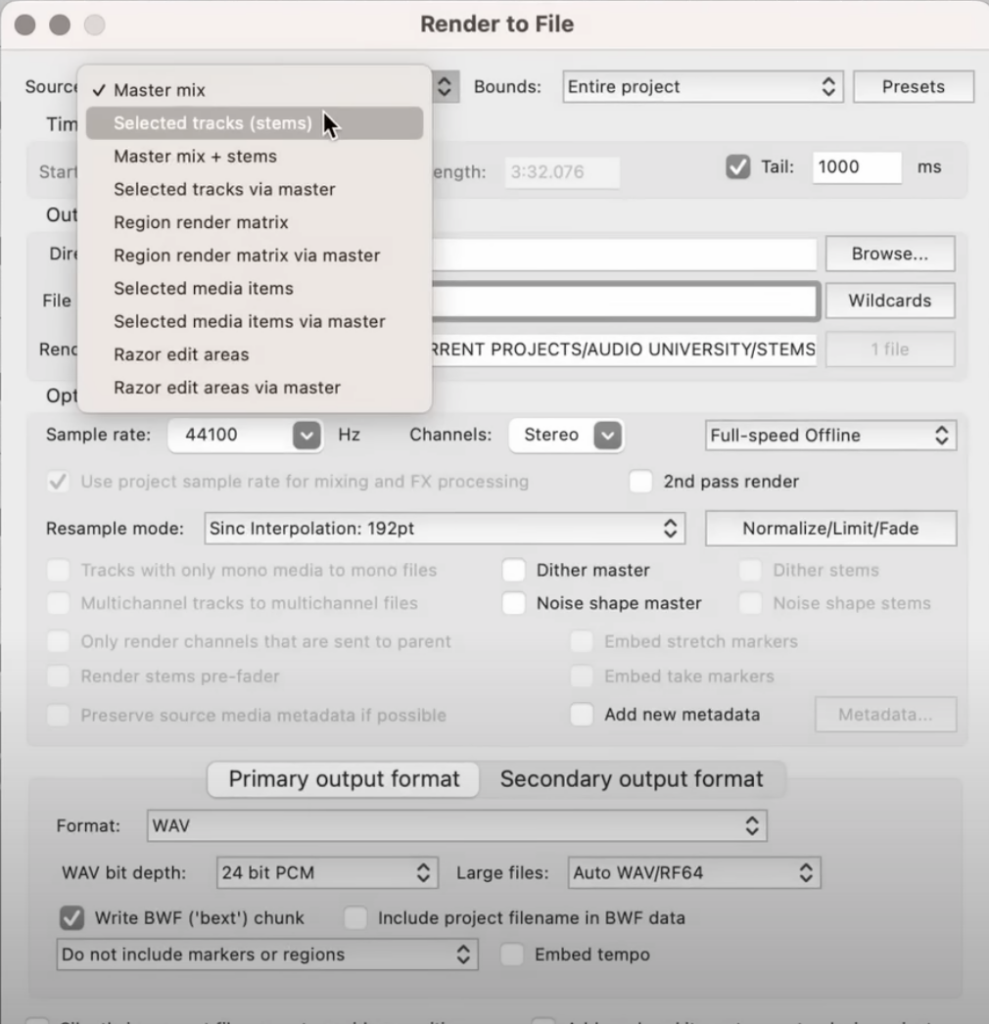
Most DAWs make exporting tracks very easy and straightforward. In Reaper, you can click ‘File’, then ‘Render’. This will open up a dialog box.

At the top, I will change the “Source” from “Master mix” to “Selected tracks (stems)”. As you’ll see, this is the same setting you’ll use to export stems. Since we are exporting tracks, we just need to select each individual track in the session. I’ll also select the click track in case that is useful for the person I’m sending it to.
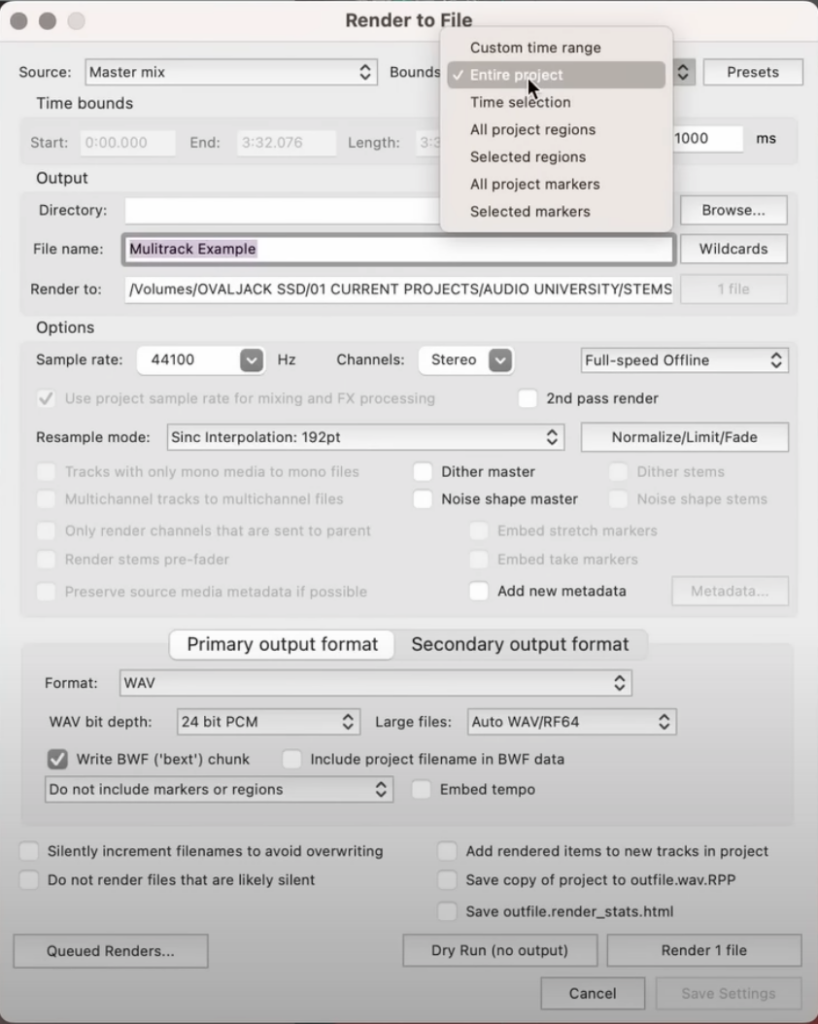
The “Bounds” setting can be the “Entire project” or you can choose “Time selection” and highlight the section of the timeline you want to export.
I’ll change the sample rate and bit depth to the desired values and I’ll also select mono. If you have some stereo files like drum overheads or a stereo keyboard recording, you may want to run a separate rendering for those tracks with “Stereo” selected.
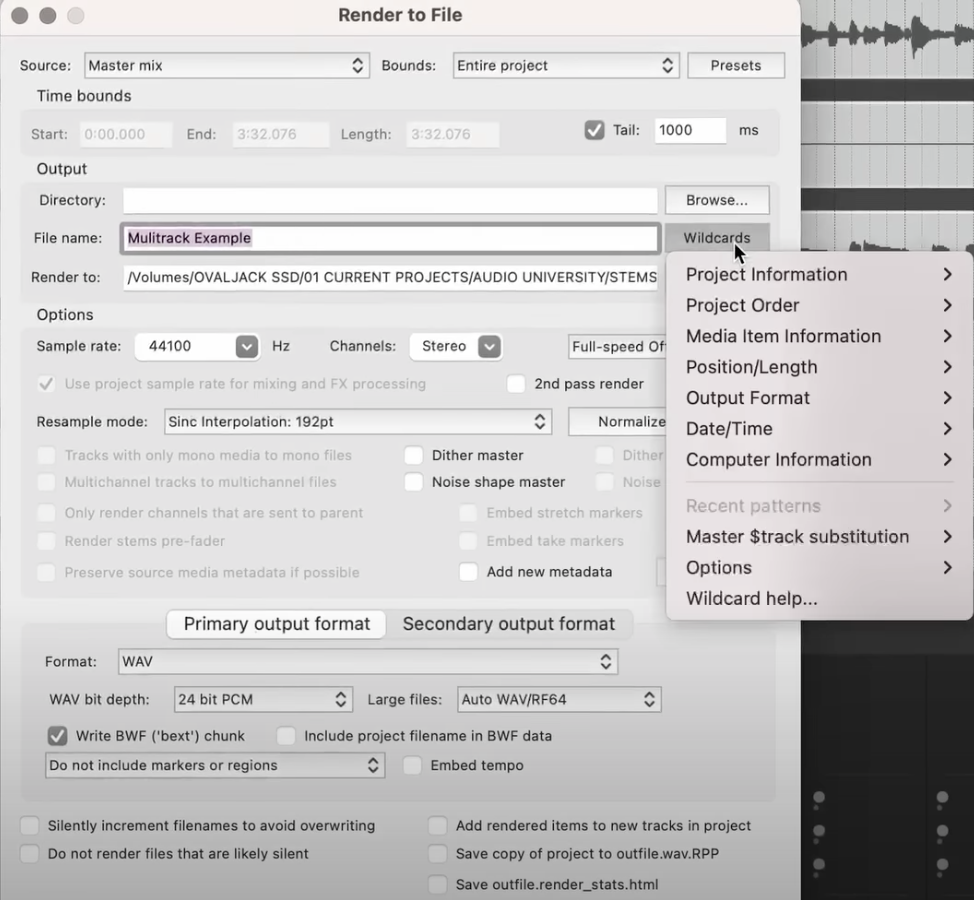
The goal is to make sure it’s easy to recognize each file and to make it as simple as possible for the person on the other end. So let’s look at how the rendered files will be labeled.
This part is dependent upon personal preference, but I’ll go ahead and use these “Wildcards” which pull information from the session for each file that’s being exported. By choosing “track number” – “track” – “project”, each file will be named and sorted in ascending order from the top of the session to the bottom. So the kick file will be labeled “01-Kick-Song Title”, the snare will be labeled “02-Snare-Song Title”, etc.
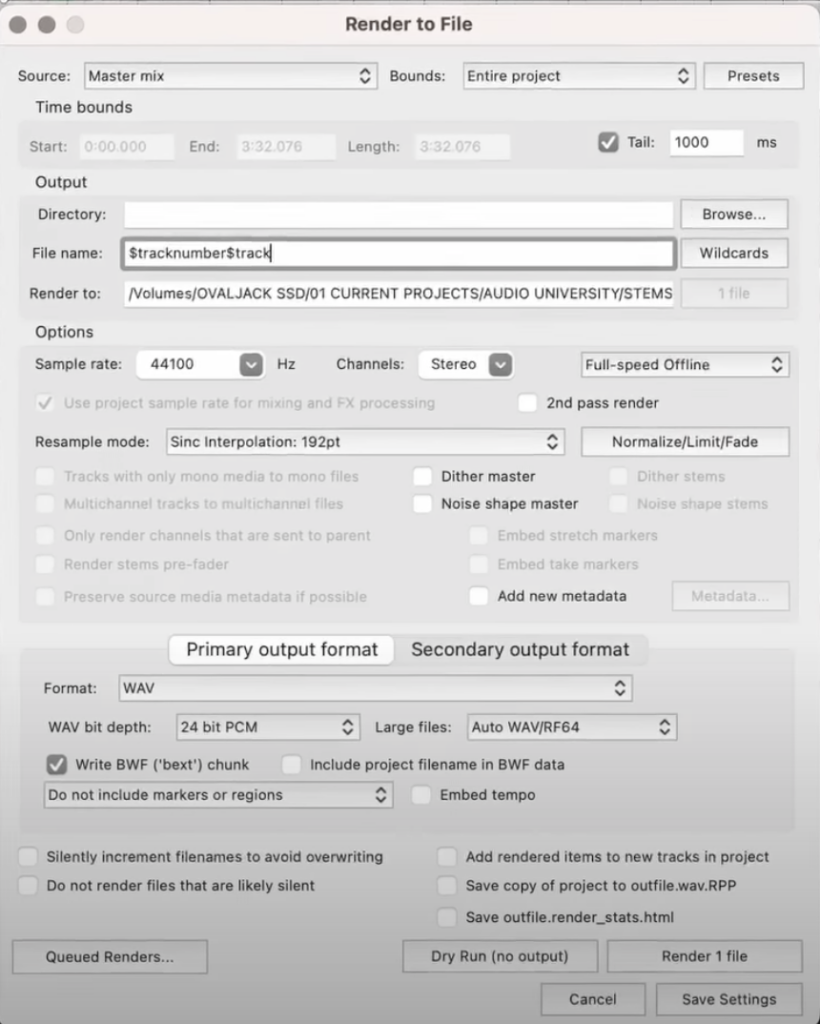
As you can see here, it’s now as simple as dragging these files from the folder into a blank DAW session, and the files will be sorted in a relatively predictable way (based on the track number rather than the track name).


Exporting Stems
Stems are not individual tracks. Stems are stereo renderings of groups of tracks (such as drums, vocals, and instruments). The specific groupings for your stems are entirely dependent on the situation or any standards you are working within.
In addition to being groups of tracks rather than individual tracks, stems are also already mixed. The idea is often that you can edit or adjust the groups or stems to fit sound for picture or for use as tracks in a live performance. Though, there are infinite possibilities for how stems might be used.
On Epidemic Sound, you can download the full mix of any song in the library or download the stems. I highly recommend Epidemic Sound if you use music or sound FX in your work.
When I download the stems for a song and drag them into a blank session, they are the same length and they already contain panning (which is only possible because each stem is a stereo file).
The process for exporting stems is slightly different. First, we need to route the tracks to the appropriate stem groups. If you work with busses in your DAW template, you may already have these groupings, but if not, I’d recommend doing a “Save As…” on your session so you can easily revert back to your original session.
Then, you can create a bus for each stem you wish to render and start to group the tracks (either by using bus sends or by dragging and dropping each track into the respective group).
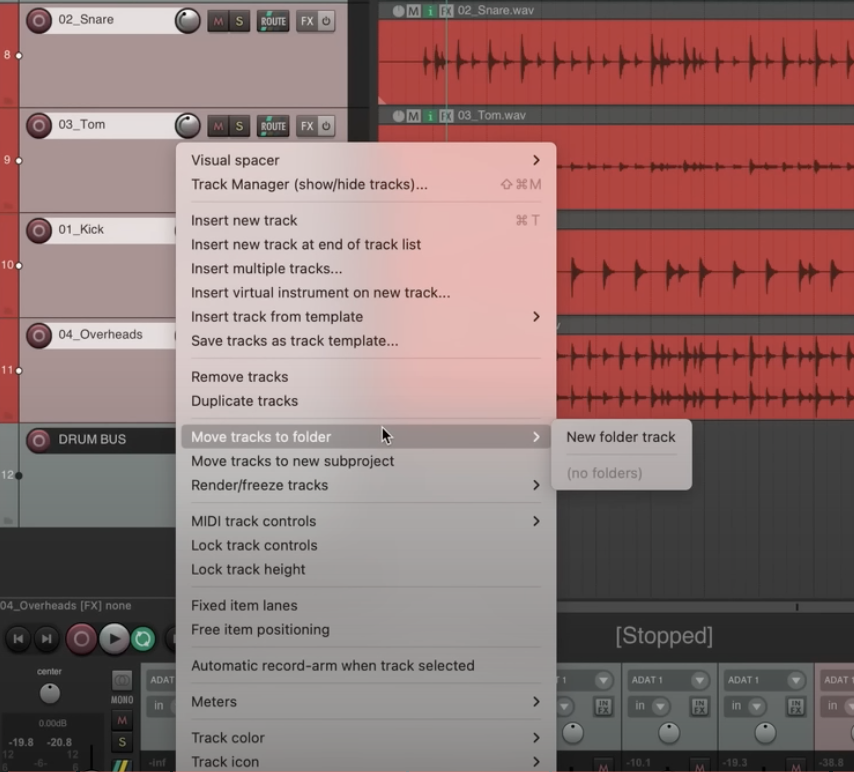
I’ll create a drum bus. Then I’ll highlight my drum tracks and drag them onto that track to create a track folder. I can do the same thing with “Bass & Guitar” and the same thing with “Vocals”.
Each group will include the FX on the respective tracks and busses. However, this will not include anything on the master bus. For that, you will need to choose “Selected tracks via Master”. This will run each stem group through the master processing one at a time. In most cases, I think it’s best to leave the master bus processing out though.

The stems will also not include any FX returns unless you select those tracks or busses. Even if you do select them though, all of the reverb would be mixed into a single track, which may not be what you want.
If you want to keep reverbs together with the respective stems (i.e. drum reverb in the drum stem and vocal reverb in the vocal stem), you may choose to use a different method for exporting.
Rather than using the selected tracks option, you can choose the master mix option. Then you can solo the things you want to be included in each stem. For example, I might solo the vocals and the reverb track and then render. Then solo the drums and reverb track and render. It takes a bit longer to do it this way compared to batching them all together. You’ll just need to choose whichever method that gives you the stems you need.
This topic goes a lot deeper than I’ve covered here, but hopefully, you have a better understanding of what tracks and stems are. Like I said, people will often use these terms interchangeably, but there are different ways to export files. So it probably wouldn’t hurt to clarify before assuming.