The mid-side technique is one of the most powerful and most fascinating techniques in recording and mixing! This post will give you the opportunity to hear the technique for yourself. I’ll show you how it works and how to set it up.
All that’s coming up, but if this is our first time meeting my name is Kyle. Welcome to Audio University!
How Stereo Microphone Techniques Work
I won’t go too deep into the theory behind stereo microphone techniques in this video, but there are a few basic concepts I need to cover in order for you to understand the mid-side setup. If you want to dive deeper, check out the Audio University called 6 Must-Know Stereo Microphone Techniques.
Said simply, a stereo microphone technique is a way to create a more immersive listening experience by playing on the way that we humans localize sounds.
Interaural Level Differences
One way we localize sound is called an interaural level difference. This means that our mind takes into account the difference in level between the left ear and the right ear.
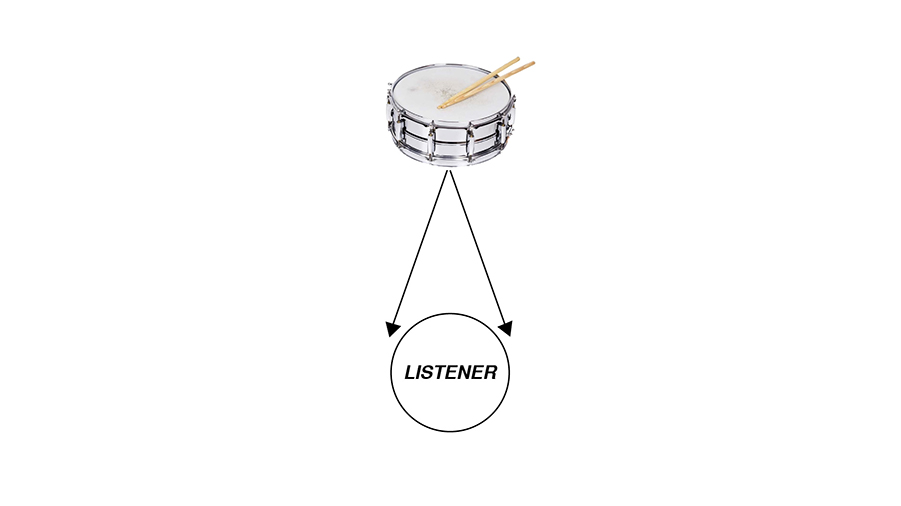
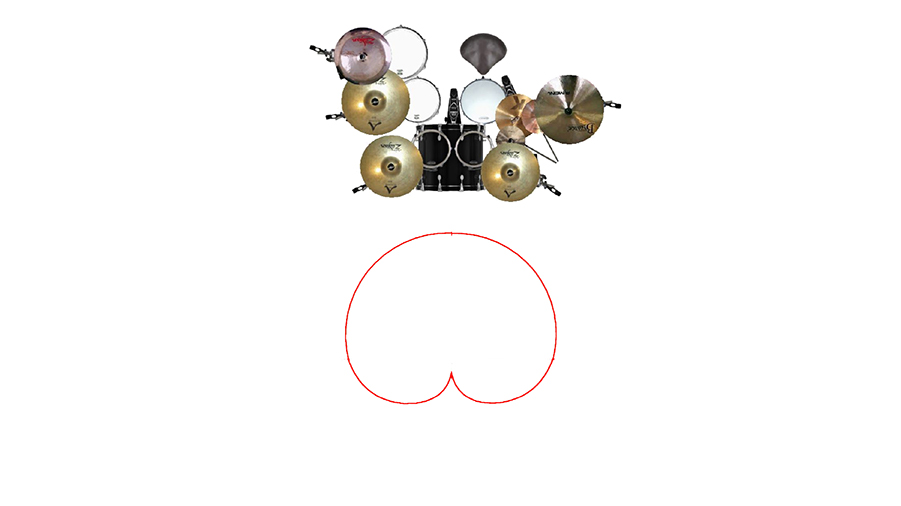
Imagine a snare drum placed directly in front of you. The sound from the snare drum travels the same distance to both your left ear and your right ear and is therefore equally loud in both ears.
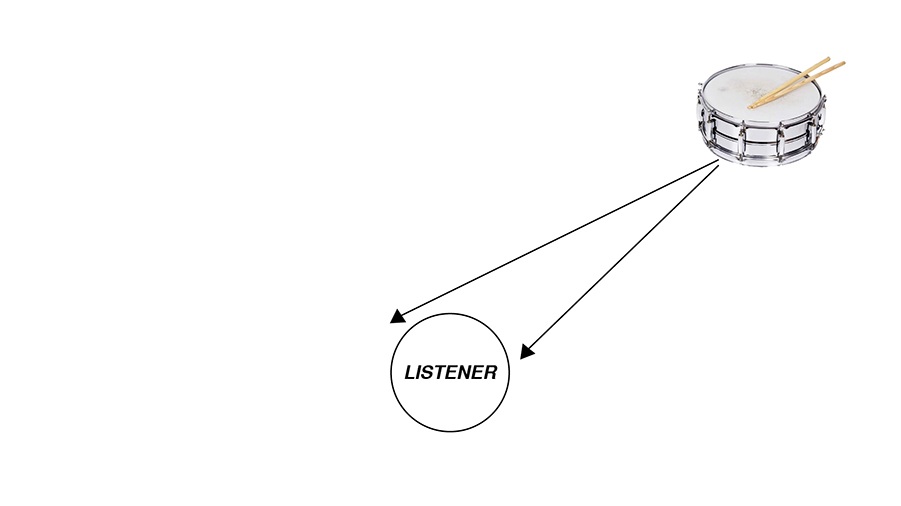
However, if the snare drum were placed off to your right side the sound would take a longer path to your left ear and would be slightly quieter by the time it reached the left ear.
Benefits Of The Mid-Side Technique
There are two benefits of the mid-side technique that make it stand out from other stereo microphone techniques.
Mid-Side Offers More Stereo Width Control
The first is that it allows the mixing engineer to widen or narrow the stereo image after recording.
Most other stereo mic techniques require that you get the placement right before pressing record and once you do press record you’re pretty much stuck with what you’ve got.
Mid-Side Is A Coincident Pair
Secondly, mid side is considered a coincident pair which means that both microphones occupy the same point in space.
This ensures that the signals from each microphone will be time-aligned. That means a mid-side recording is 100% mono compatible!
How To Set Up Mid-Side Technique
Setting up a pair of microphones in mid side is pretty simple. You’ll need one cardioid microphone and one bi-directional, or figure-eight, microphone.
Place the cardioid microphone so that it faces the sound source you’re recording. The direction the cardioid faces will be the center of the stereo image.
This microphone provides the mid of our mid-side pair.
Place the bi-directional microphone just above the cardioid mic with the lobes of the pickup pattern facing the sides.
This microphone will provide the side element for the mid-side technique.

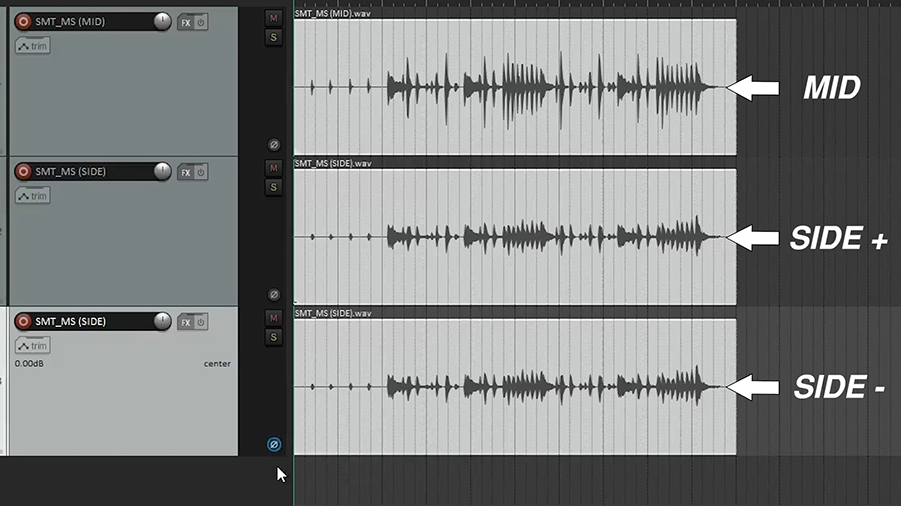
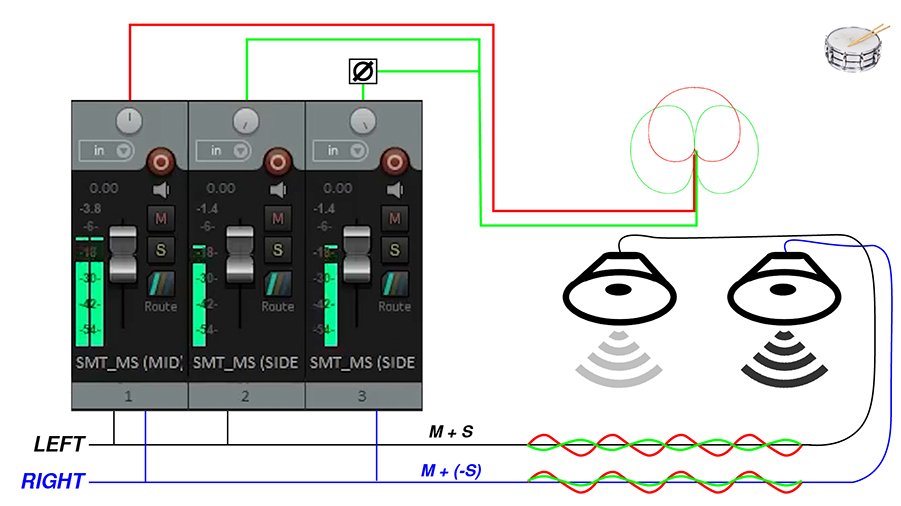
With the signal from the two microphones routed to your mixer or your DAW, you’ll duplicate the bi-directional microphone and invert the polarity of one copy.
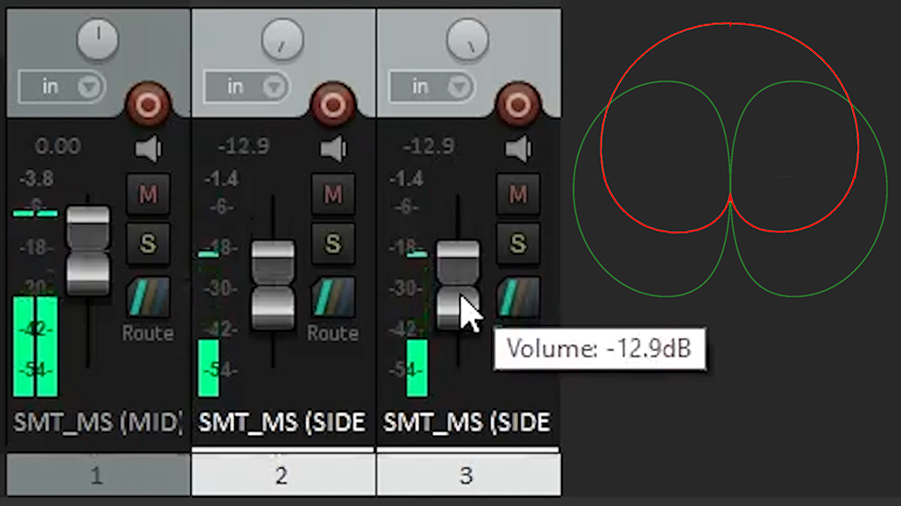
Now you’ll have three channels: the mid microphone with normal polarity, the side microphone with normal polarity, and the side microphone with inverted polarity.
Keep the mid microphone panned to the center and pan the two copies of the side microphone to opposite sides – one all the way to the left, one all the way to the right.
This setup allows you to adjust the stereo width of your recording after you record. Turning the side microphones up will make the stereo width wider while turning the side microphones down will keep the sound anchored in the center.
By the way, the cardioid can be replaced with another figure-eight mic or an omni.
How The Mid-Side Technique Works
Let’s take a closer look at how the mid side technique works.
Remember that the mid microphone is equal in both speakers because it’s panned to the center. Meanwhile, the side channels with opposite polarity are panned hard left and right.
Let’s imagine a sound source directly in front of the mid microphone. When it reaches the mid microphone it creates positive pressure on the mid microphone capsule, which results in a positive voltage.
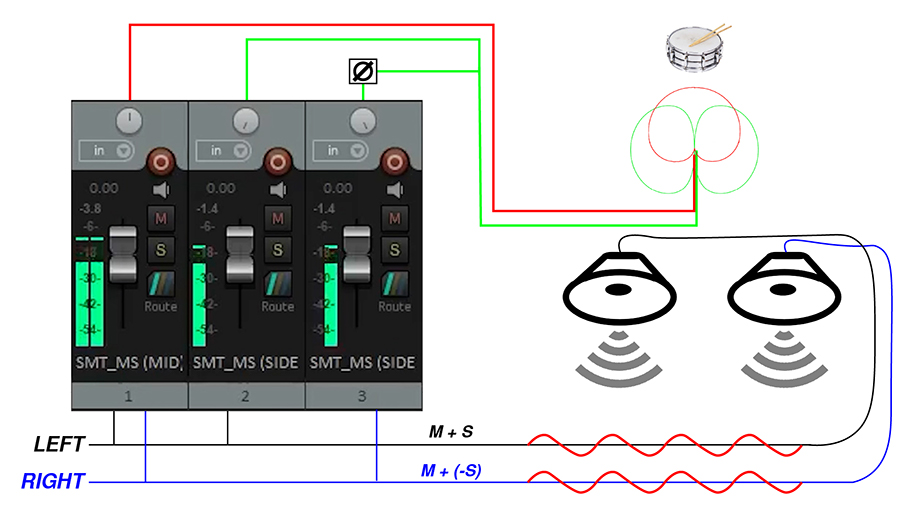
That same sound reaches the null of the figure-eight microphone. This results in the sound coming out of both speakers evenly, which tells our brain that the sound originates from directly in front of us.
Now imagine the same sound coming from the left side. It still creates a positive voltage on the mid microphone, but this time it also hits one side of the figure eight mic.
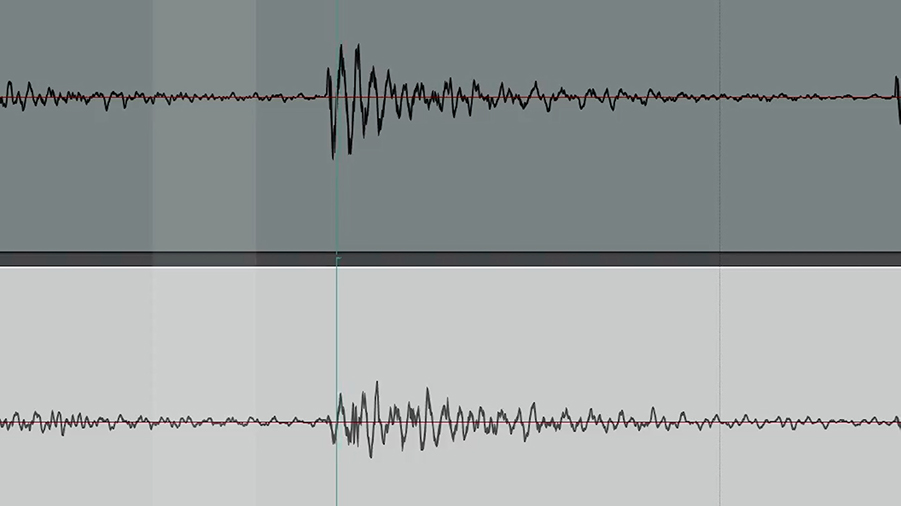
In the left speaker, the positive voltage created by the mid microphone combines with the positive voltage created by the left copy of the side microphone resulting in an increased level on the left side.
In the right speaker, that positive voltage from the side microphone becomes a negative voltage because the polarity of that signal is inverted. This results in some cancellation of the sound in the right speaker as the positive mid signal and the negative side signal interfere with one another.
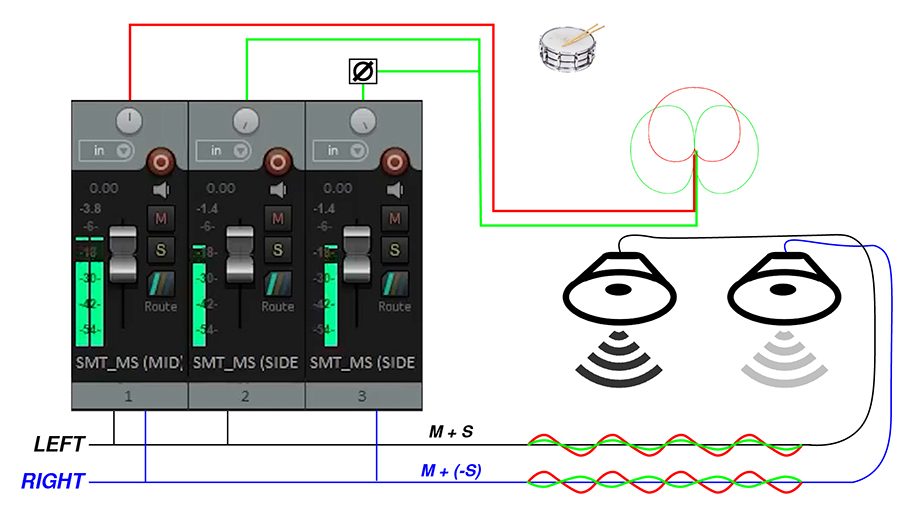
The exact opposite thing happens with a sound coming from the right side.
As the side channels are brought up and level, these interactions are accentuated and as the side signals are turned down, the interactions are reduced.
If the three channels are mixed together into one mono speaker, the side channels will cancel out because they’re polar opposites of one another. The listener will be left with only the mid microphone.
More About Stereo Microphone Techniques
This is just one of many stereo microphone techniques that exist. If you want to learn more about stereo mic techniques, check out that post I mentioned earlier: 6 Must-Know Stereo Microphone Techniques