In this post, I’ll show you how to overdub guitar (or any other instrument) on top of a pre-recorded track.
Step 1 – Record or Import a Backing Track
In order to record an overdub, you’ll need an existing recording to use as a backing track.
Maybe you have an existing recording of your band, maybe it’s a beat you’ve created or downloaded, or maybe you want to record over a backing track that you’ve downloaded.
If you have an existing session with the backing tracks in your DAW, open it up. If you don’t yet have your backing track in a session yet, just start a new session in your DAW and drag and drop the audio file into a new track.
When you press play, you should hear the backing track playing through your speakers or headphones.
If you don’t hear sound from your speakers or headphones or if this is the first time you’ve recorded with your interface, check out the post I wrote, called Audio Interface Quick Start Guide.
Step 2 – Create a New Track
The next step is to add a track for your guitar overdub. I’m going to change the input of this track to “Input 1”.
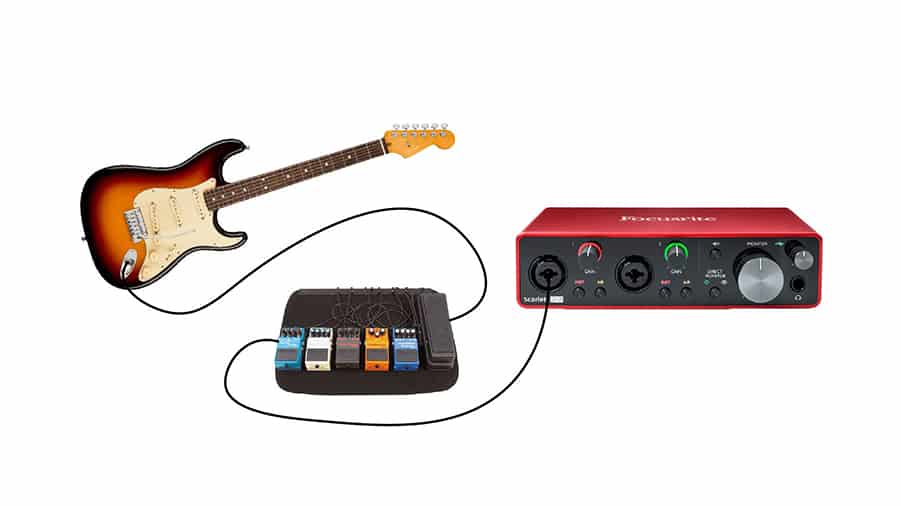
I could connect my electric guitar directly into the instrument input of my interface, making sure that the line/instrument switch is set to “Instrument”. You can even try connecting your guitar to your pedalboard and then to your interface.
If you are connecting the guitar directly, you’ll probably want to use an amp modeling plug-in. The direct sound of a guitar can be pretty weak sounding, otherwise. You might be surprised to hear the direct sound of your guitar if you’ve only ever heard it through a guitar amplifier!
There are a lot of great amp simulator bundles that give you access to dozens of emulations of classic guitar amplifiers and cabinets. I am amazed by the realism offered by the BIAS Guitar Amp Simulator Plugins. The sound is extremely realistic and the details are incredible. In addition to being able to choose digital amps that are designed to emulate classic amplifiers, you also get the ability to adjust the mic placement on the cabinet, which tubes are in the amp, and so many other aspects!
You can also record your guitar amplifier with a microphone…
Simply connect your guitar and effects pedals to your guitar amplifier as you normally would. Connect the microphone to the input on your audio interface that you selected on the track in your DAW.
I like to start with the microphone about halfway between the center of the speaker cone and the edge of the speaker. Try shining a flashlight into the grill of the cabinet if you’re having trouble determining where the speaker is.
Watch this video on how to find the right sound with mic placement:
Step 3 – Set Up Input Monitoring
You’ll need to hear the backing track and your guitar in order to get the best performance and recording. This means we need to set up input monitoring before we record.
If you are connecting your electric guitar directly into the interface, you will probably be ok listening through speakers or headphones, especially if you’re using a solid body guitar.
However, if you are using a hollow body guitar or using a microphone to record your amplifier, you’ll want to use headphones. Turn the speakers all of the way down to avoid microphone feedback.
You should hear the backing track playing through the headphones or speakers already when you press play. In order to hear your guitar, you’ll need to choose one of the following options:
Option 1: Listening Through the DAW
Option one is to monitor through your DAW. This is sometimes done simply by arming the guitar track. If you don’t hear your guitar after arming the guitar track, you may need to click the input monitor button on the guitar track, also.
This option sometimes adds too much delay to the signal, making it difficult to stay on time while recording.
The benefit of this option is that you’ll be able to hear the effects on the guitar during the recording.
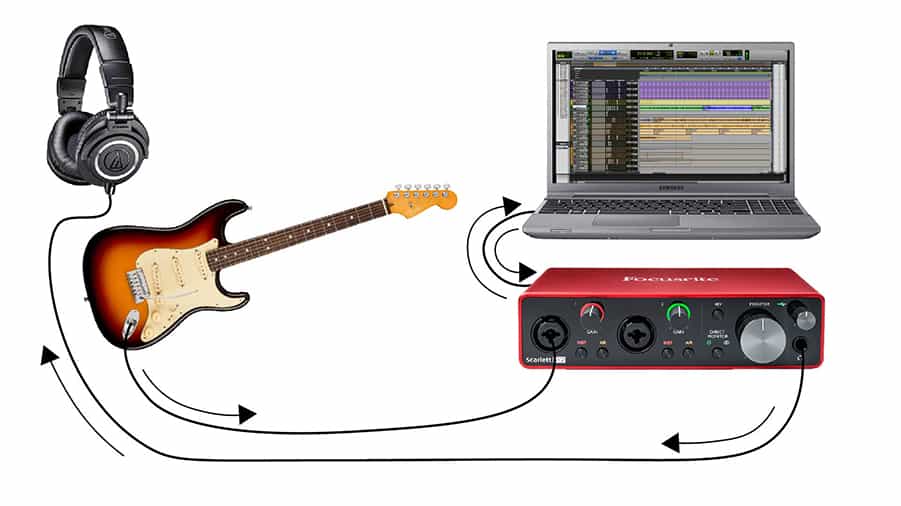
Option 2: Audio Interface Direct Monitoring Feature
Option two is to use the direct monitoring feature on your audio interface which adds much less delay or latency. If you’re using the Focusrite Scarlett 2i2, this is called “Direct Monitor”.
You’ll still want to arm the guitar track in the DAW. However, if you’re using the direct monitoring feature, you should also mute the guitar track or turn off input monitoring on the guitar track to avoid an echo.
Once you have armed the track, you will start to see the level meter jump when you play the guitar. While playing the guitar, increase the preamp gain knob on that input until the meter peaks at about -12 dBFS.

Step 4 – Record Guitar Overdub
Now that you’ve got your backing track loaded and your guitar track is armed and ready, it’s time to press record. The backing track will start to play and you’ll be able to hear your guitar as you play.
Listen back to the tracks by turning off the record arm on the guitar track and pressing play.
If you are using an amp simulator, you can make adjustments to the sound after the recording. If you are recording your amplifier with a microphone, you may need to make adjustments to the amp settings and re-record until you get the right sound.